Fashion Friday

DIY Reusable Grocery Bag

DIY-Reusable-Grocery-Bag-Farmers-Market-Shopping-Bag-9
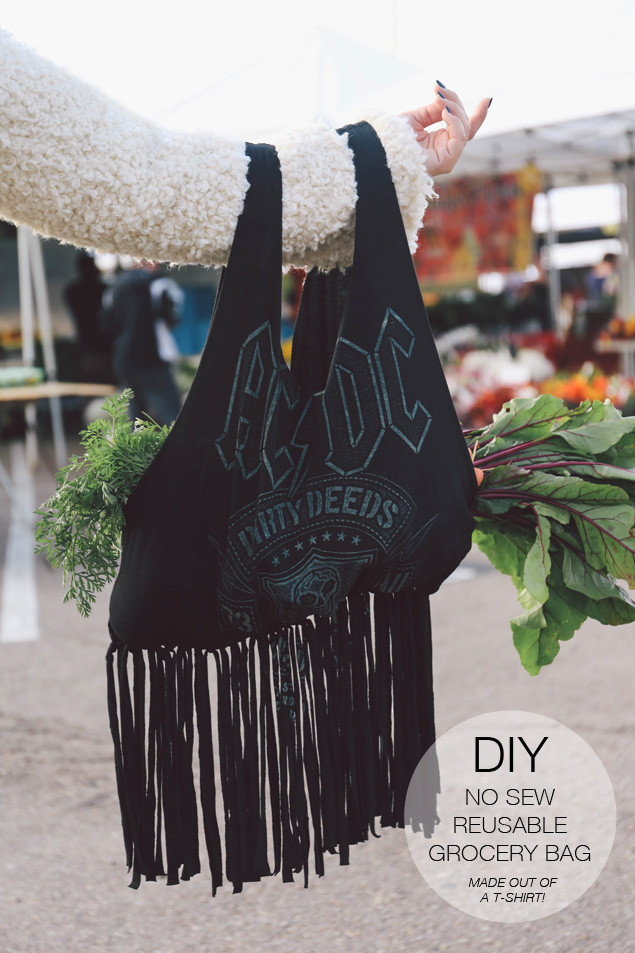
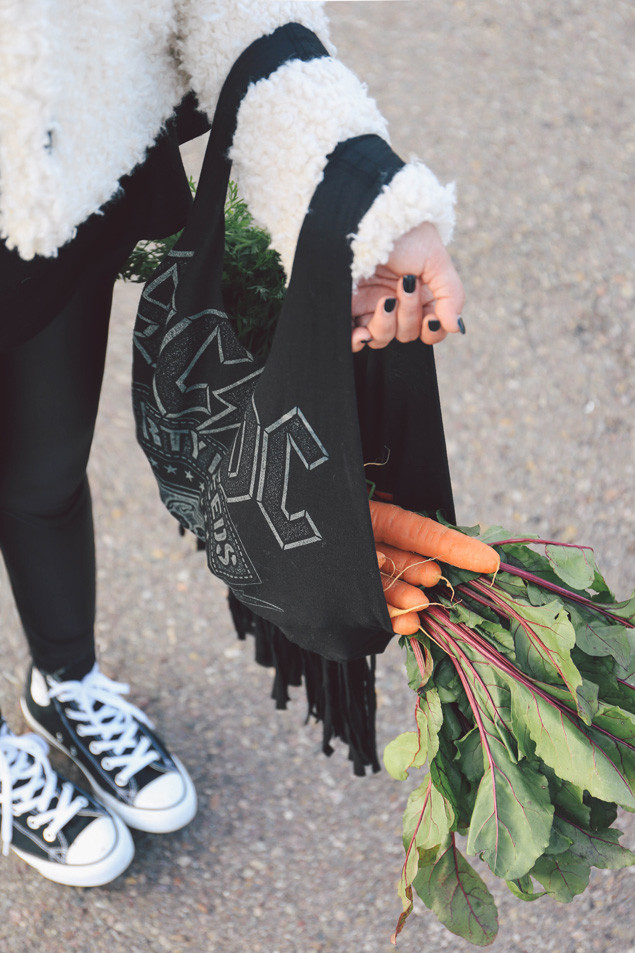
I haven’t done a “Fashion Friday” DIY for sooooo long, and since it’s a new year, it’s definitely time! This DIY was inspired by Cassey from Blogilates! I always have my car stocked with reusable shopping bags for last minute farmer’s market and grocery shopping trips, and thought this “do it yourself” bag/tote was the cutest addition to my collection. You can use any old T shirt (the bigger the better!) but I decided to buy an ACDC shirt from Target to give my bag a chic rocker look! I’m absolutely obsessed with how it turned out and got stopped a couple of times at the North Park Farmer’s Market in San Diego to ask where it was from (major points!)!
DIY-Reusable-Grocery-Bag-Farmers-Market-Shopping-Bag-1
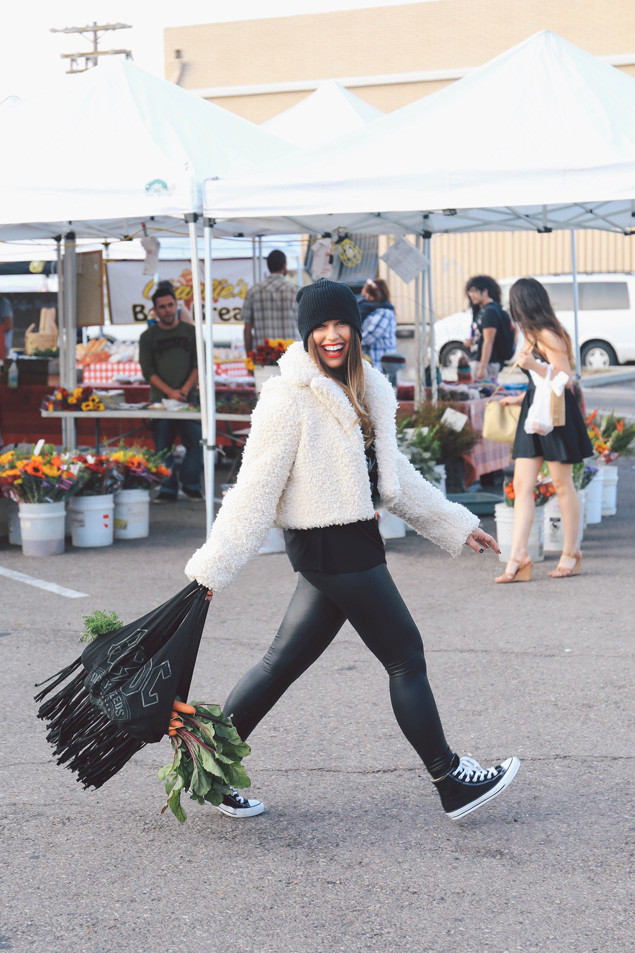
Jacket: c/o Smythe (on sale 65% off & free shipping!)  |  Leggings: American Apparel  |  Shoes: Converse  |  Beanie: Ebay (black)  |   |  Lip Liner: Mac ‘Cherry’  |  Lipstick: Lime Crime ‘Red Velvet’

My favorite part about this DIY is that it’s a no sew project! No needle, thread, or sewing machine required! All you really need is a pair of scissors and an old T shirt, but if you are a perfectionist like me, a white or colored pencil, ruler, and rotary cutter, will do the job just perfectly! If you are super crafty and looking for a rotary cutter, cutting mat, and ruler set, this one by Fiskars is amazing!

DIY-Reusable-Grocery-Bag-Farmers-Market-Shopping-Bag-3 DIY-Reusable-Grocery-Bag-Farmers-Market-Shopping-Bag-4
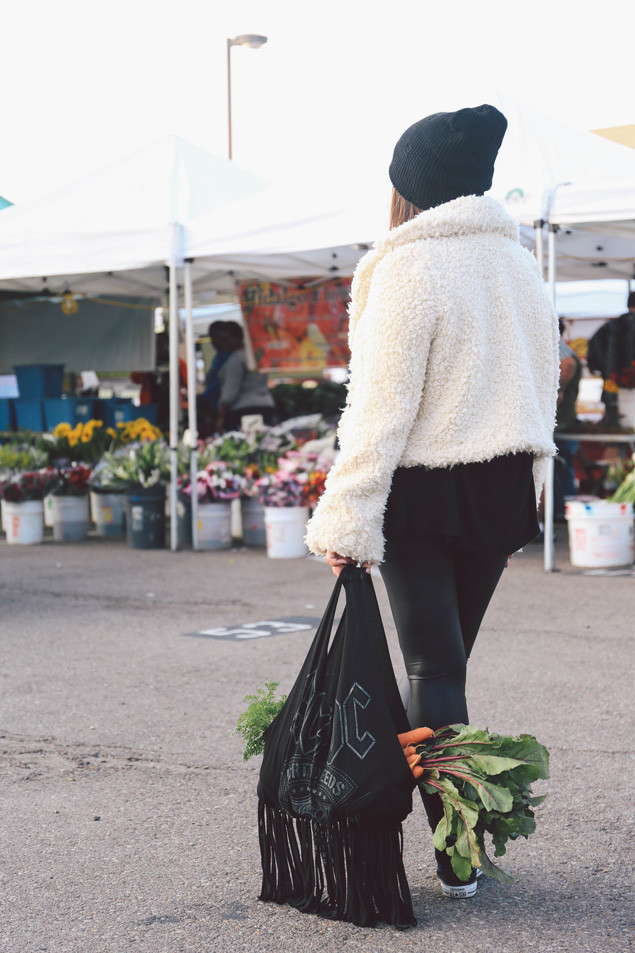
I’m obsessed with my new Faux-Fur Cropped Jacket by Smythe! It’s faux shearling with a huge oversized collar that is seriously way too cute. I’ve been wearing it nonstop since they sent it to me! I also just found out that it’s on sale at Neiman’s for 65% off, which is INSANE! Oh and did I mention they are offering free shipping? Unreal.
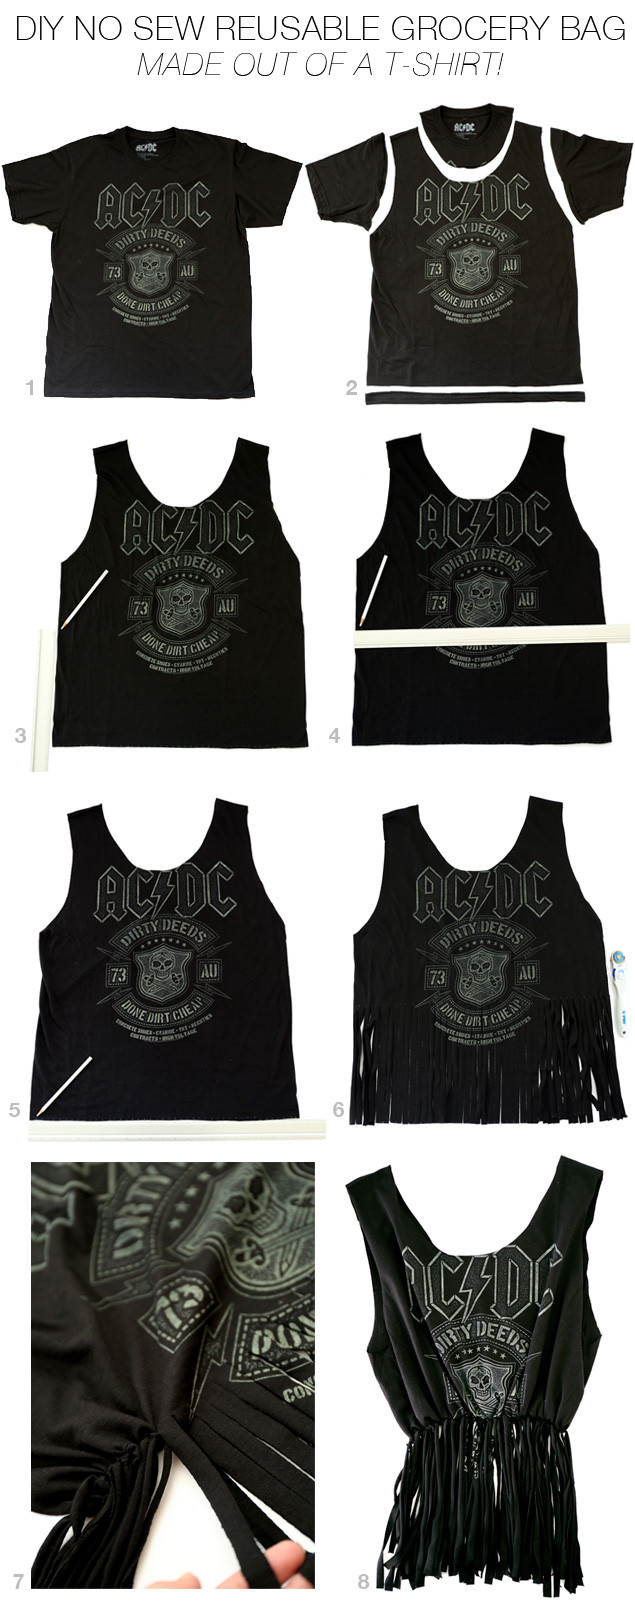
DIY-Reusable-Grocery-Bag-Farmers-Market-Shopping-Bag-5DIY-Reusable-Grocery-Bag-Farmers-Market-Shopping-Tote-Step-By-Step-2DIY Grocery Bag

Ingredients
T-shirt (the bigger the better)
white or colored pencil
scissors or rotary cutter
ruler
cutting mat

Directions
1. Get a large T shirt and lay it flat.

2. Cut off the neck (about 2-3 inches below the neck hemline), sleeves, and bottom hem.

3. From the bottom of each arm hole, measure down 6 inches and make a mark. This is where the bottom of your bag will be, and your fringe pieces will start.

4. Line your ruler up horizontal across the shirt from both marks that you just made. Start marking small dots/lines 1/2 inch apart all the way across the entire width of the shirt. This marks where each fringe will be cut.

5. Place the ruler horizontally across the bottom of the shirt and mark small dots/lines every 1/2 inch all the way across (the same way you just did in step 4). This will help you to get perfectly aligned/straight fringe pieces.

6. Using scissors or your rotary cutter and ruler, cut from the top dot, straight down to the aligning bottom dot (through both layers of fabric). Work from left to right until all of the fringe has been cut.

7. Once all of your fringe pieces have been cut, double knot both of the corresponding front and back pieces of fabric together. This will seal up the bottom of your bag.

8. Voilà, Your grocery bag is complete! For even longer fringe and more sealed up edges of your bag, stretch out your fringe and handles!

Note: If you don’t want to go through all of the marking and aligning with a  ruler, you can totally freehand it and make bigger fringe pieces with scissors. I personally think it looks best when you take the time and measure out the small 1/2 inch fringe pieces, but it’s still an awesome and fun DIY no matter how you do it!

DIY-Reusable-Grocery-Bag-Farmers-Market-Shopping-Bag-6
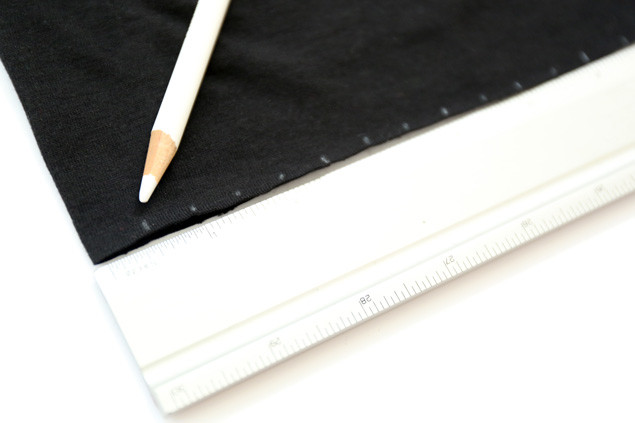
Above is an example of the dots 1/2 inch apart along the bottom of the fabric.

DIY-Reusable-Grocery-Bag-Farmers-Market-Shopping-Bag-7
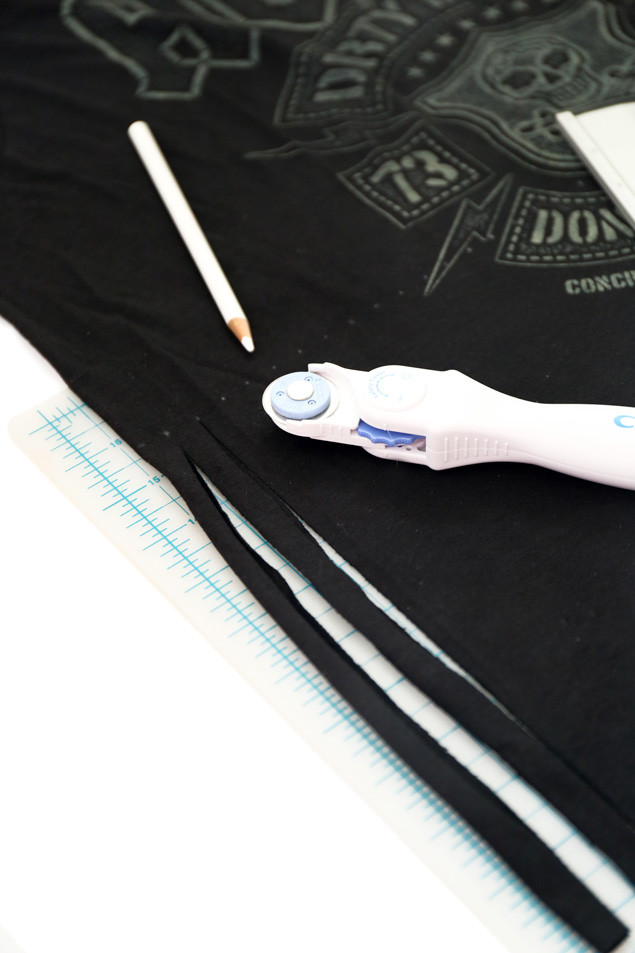
Cutting from top to bottom dot.

DIY-Reusable-Grocery-Bag-Farmers-Market-Shopping-Bag-8
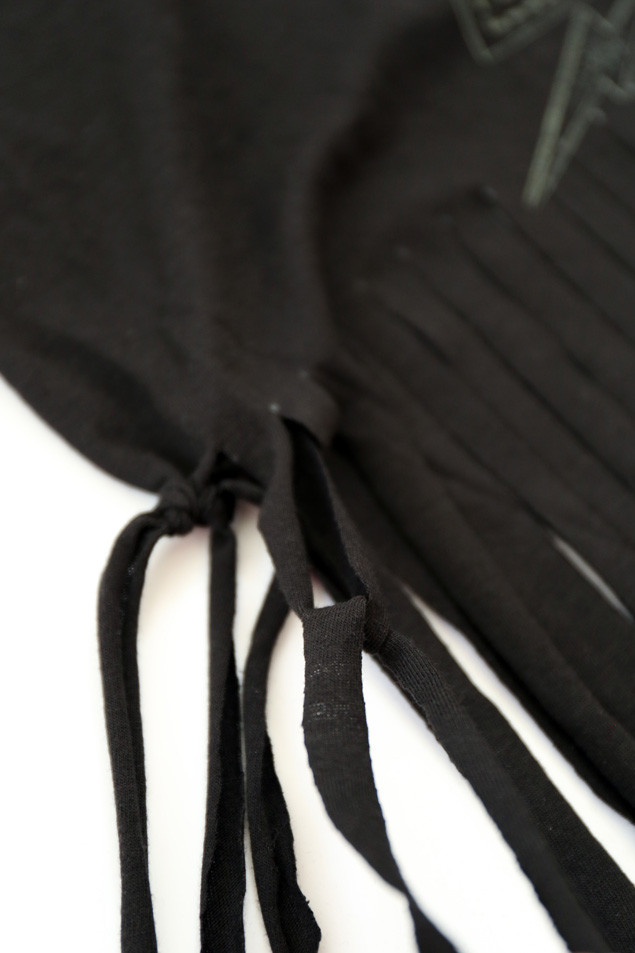
Double knotting the fringe pieces.

DIY-Reusable-Grocery-Bag-Farmers-Market-Shopping-Bag-2
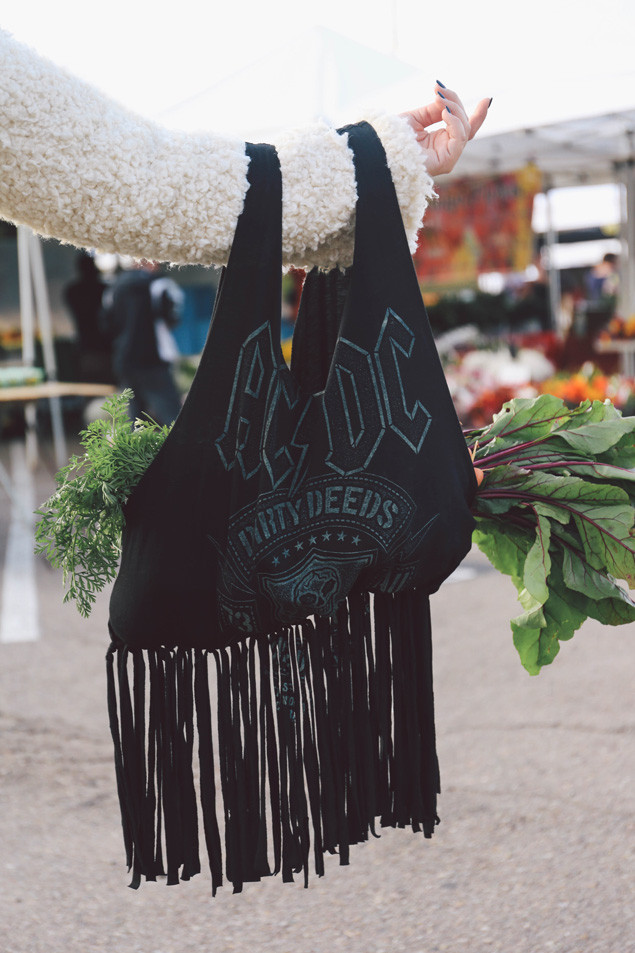
So cute! Grocery shop away!
This is a really fun project to do with friends for a girls night in, and it also makes a super cute gift!

Health & Happiness
xo-Catherine

NYFW Skinny Bunny Cleanse

New York Fashion Week is here! I’m collaborating with Beckley Boutique to bring you a whole food cleanse that will have you hopping into those skinny jeans in no time. This cleanse is also great if you are looking to reset your taste buds, jumpstart your weight loss, or need to get ready for a big event.

Beckley-Logo

On the Skinny Bunny 5 Day Cleanse, you can lose up to 8 pounds and you will get to enjoy a filling breakfast scramble, layered lunch parfait, sweet and tangy dinner salad, and satisfying dessert smoothie each day! In comparison to popular all liquid juice cleanses, a cleanse that is high in fiber is much easier to stick with as fiber keeps you feeling full and satisfied and never deprived. Fiber slows the rate at which sugar is absorbed into the bloodstream keeping your blood glucose levels from rising too fast. It also cleanses your colon, acting like a little scrub brush. This scrubbing effect helps clean out bacteria and other buildup in your intestines. Fiber also helps to keep bowel movements regular to avoid bloat.

Skinny-Bunny-Fashion-Week-Cleanse

All you need are these 5 versatile nutrient packed foods and 5 days of commitment. Yes, this cleanse consists of only 5 foods! All of the ingredients on this cleanse are interchangeable and versatile enough to create 4 completely different meals!

MEET THE 5 FOODS:

  • Raspberries – Raspberries contain around 8 grams of fiber per cup that helps you feel full. They also contain a natural substance called ketones which prevent an increase in overall body fat and visceral fat. Raspberries are also filled with antioxidants.
  • Spinach – Filled with fiber and vitamin A. One cup of spinach has nearly 400 percent of your daily Vitamin A requirement.
  • Greek Yogurt (plain nonfat) – Rich in protein and filled with probiotics. Probiotics “friendly bacteria” can help your gut and flatten your tummy.
  • Egg Whites – The protein in eggs ranks highest among all foods in biological value. This means that the protein from eggs gets absorbed into the body better than other foods.
  • Almonds – Olec acid found in the healthy fats in almonds triggers your small intestines to produce oleoylethanolamide, a compound that curbs hunger pangs. One ounce of almonds provides 20 percent of the magnesium you need each day. Almonds are also rich in minerals, B vitamins, and Vitamin E, one of the body’s key antioxidants, plus fiber and protein.
  • Seasonings: Cinnamon (has anti-inflammatory properties), vanilla, stevia, turmeric, garlic, lemon, red wine vinegar, balsamic vinegar, and black pepper.

IMPORTANT CLEANSE DETAILS:

  • Space meals 3-4 hours apart
  • Drink 8-10 glasses of water
  • an additional 2 cups of green tea per day is optional
  • No soda, or added sugar

SKINNY BUNNY CLEANSE SHOPPING LIST:

  • Almonds: 15 Tbsp (2 6oz packages) plus 1 jar of almond butter
  • Egg Whites: 5 cups liquid egg whites total (3 16oz containers of liquid egg whites) or 30 egg whites
  • Greek Yogurt: 60 oz. total – 10 6oz single serve containers or 2 32oz tubs
  • Spinach: 15 cups total which you could divide between fresh and frozen (check the package to see how many cups there are)
  • Raspberries: 20 cups total, again you can split between fresh and frozen (check the package to see how many cups there are)
  • Optional Seasonings: Cinnamon, vanilla, stevia, turmeric, garlic, lemon, red wine vinegar, balsamic vinegar, and black pepper.
  • Vegan Swaps: 1/4 package of Tofu can be substituted for eggs & soy yogurt can be substituted for Greek yogurt for a vegan option.

The Serious Stuff: I do not recommend exercising during the cleanse, since it does not provide enough calories. Please consult with your physical before making any changes to your diet.

Skinny-Bunny-Cleanse-NYFW-1
Skinny-Bunny-Cleanse-NYFW-2

BREAKFAST – SCRAMBLE & FUIT

¼ cup egg whites
1 cup spinach
1 cup raspberries
2 Tbsp sliced or slivered almonds
cinnamon

Directions: Using olive oil cooking spray, scramble egg whites with 1 cup of spinach. Add any salt free seasonings such as black pepper, turmeric, or garlic to taste. Place raspberries in a separate bowl and sprinkle with cinnamon and top with 2 Tbsp of almonds.

Recommendation: for breakfast I recommend using frozen chopped spinach.

Skinny-Bunny-Cleanse-NYFW-3
Skinny-Bunny-Cleanse-NYFW-4

LUNCH – LAYERED YOGURT & FRUIT PARFAIT

6oz plain nonfat Greek yogurt (single serving container)
1 cup raspberries
2 Tbsp sliced or slivered almonds
cinnamon

Directions: Layer the bottom of a jar or bowl with half of the Greek yogurt, then add half of the almonds, half of the raspberries, sprinkle with cinnamon, and repeat layers once more to create a parfait.

Recommendation: I like to make my lunch parfait in the morning inside of a glass jar using frozen raspberries. This way I can leave it in the fridge and the raspberries are defrosted just in time for lunch. If you don’t like the taste of plain greek yogurt, add stevia and vanilla to taste.

Skinny-Bunny-Cleanse-NYFW-5
Skinny-Bunny-Cleanse-NYFW-6

DINNER – SWEET & TANGY SPINACH SALAD

2 cups of fresh spinach
¼ cup egg whites
1 cup raspberries
2 Tbsp sliced or slivered almonds
1 Tbsp Red Wine Vinegar or Balsamic Vinegar
Splash of lemon juice
Pepper

Directions: In a large bowl, combine the fresh spinach, raspberries, and almonds. Toss with your choice of vinegar and a splash of lemon juice. Then scramble egg whites and add on top of the salad. Add pepper to taste.

Skinny-Bunny-Cleanse-NYFW-8
Skinny-Bunny-Cleanse-NYFW-9

DESSERT – SATISFYING SMOOTHIE

6oz plain nonfat Greek yogurt
1 cup raspberries
1 Tbsp almond butter (unsalted and unsweetened)
½ tsp ground cinnamon
½ tsp pure vanilla extract
3 Ice cubes
splash of water

Directions: Combine Greek yogurt, raspberries, almond butter, cinnamon, vanilla, and ice cubes in a blender. Add small amounts of water until preferred thickness is desired. Blend away and enjoy.

Recommendation: Use frozen raspberries to make your smoothie extra thick and cold.

Happy fashion week style bunnies!
Health & Happiness
xo Catherine

DIY Workout Headband

Happy Fashion Friday, and welcome to my third Workout DIY!
If you’ve already made my DIY Workout Shirt and DIY Multi-Strand Scarf you can now complete your look with a DIY Workout Headband! Keep your bangs or little whispy hairs out of your face during an intense sweat session, or hit the yoga studio in style with this super cute five strand braided headband!

Who doesn’t’ want to be decked out from head to toe in homemade RFFMBT no-sew workout clothes?!
DIY Workout Headband
Makes one chic headband
You could make up to 3 headbands depending on the size of your shirt & amount of fabric left! 

Ingredients:
1 old T-shirt
1 pair of scissors
1 piece of tape
30 minutes

1. Start with a large T-shirt. Any old shirt will do! Seamless is a plus!

2. Cut off the bottom hem of the shirt. Then cut five 1in wide strips horizontally across the shirt starting from the bottom. You can use a ruler to guide a straight line across the shirt, but don’t worry if they aren’t perfect.

3. Set the bottom hem aside. Stretch all of the remaining strips until they become long, and the raw edges start to roll inwards.

4. Cut the five strands in half so they become long strands (instead of circles).

5. Gather the five strands, and secure them onto a hard surface with tape. This will make it easier for you to braid. Take the outside left strand and place it one over to the right.

6. Take the middle strand and place it one over to the left.

7.  Take the outside right strand and place it one over to the left.

8. Take the middle strand and place it one over to the right.

9.  Have you noticed the pattern? outside over one to the right, middle over one to the left, outside over one to the left, middle over one to the right … work from the left three strands, to the right 3 strands. Keep repeating these steps (9-12 are the same as 5-8)! Take the outside left strand and place it one over to the right.

10. Take the middle strand and place it one over to the left.

11.  Take the outside right strand and place it one over to the left.

12. Take the middle strand and place it one over to the right.

13. Once you have finished braiding, trim the headband to fit your head, leaving about an inch on each end for knotting.

14. Start by double knotting one strand from each end of the braid together.

15. Match each end with another strand from the opposite end and double knot.

16. Trim the ends off of the double knots, and you’re done!

Tadaaaa! A chic headband for your next workout! You could even make 2 or 3 headbands out of one shirt, woo!
Post or email your photos if you make a headband! I can’t wait to see your creations! 

DIY Multi-Strand Scarf


I am a huge fan on no-sew projects from recycled clothing. If you were a fan of my no-sew DIY Workout Shirt, you will enjoy this one as well. Plus they will look très chic when worn together! Behold, a scarf that is perfectly lightweight and easy-to-wear to your Yoga or Bar Method class and stylish enough for running errands around town!
Oh, and did I mention there is no sewing required?!

DIY Multi-Strand Scarf
Makes one stylish scarf

Ingredients:
1 old T-shirt (the bigger the better)
1 pair of scissors
1 ruler
10 minutes


1. Start with a large T-shirt. Any old shirt will do! Seamless is a plus!

2. Cut off the bottom hem of the shirt. Then cut 1in – 2in wide strips horizontally across the shirt from bottom to armpit. You can cut as many strips as you would like (I liked my thick strips the most). The more strips, the more strands your scarf will have. You can use a ruler to guide a straight line across the shirt, but don’t worry if they aren’t perfect.

3. Set the bottom hem aside. Stretch all of the remaining strips until they become long, and the raw edges start to roll inwards.

4. Cut one end of the bottom hemline so it becomes a string.

5. Using the strip of bottom hemline, knot it around the strands to secure them in place.

6. Wrap the strip a few inches around the center of the scarf, and back over to meet the other ends. Knot the ends together tightly.

7.  Trim the loose ends and tuck the knot underneath the wrapped fabric.

Viola, a stylish scarf to wear to yoga! Wear it long or bundle it up, it’s super fun and easy-to-wear!
Post or email your photos if you make a scarf! I can’t wait to see your creations!


DIY Workout Shirt

Happy Fashion Friday!
I have a super fun arts and crafts project for my beautiful little bunnies to try over the holiday weekend!

I love buying new clothes, but sometimes I love making them even more!
I started college as a fashion design major, so I have always been a little crafty when it comes to recycling old T-shirts. This has to be my new favorite DIY reclaimed shirt. You can wear this casual racerback to your workout and then dress it up with a lacy bandeau when you meet your friends for some rabbit food afterwards. Turn your basic into a chic little number and go hit the gym like you own it!

DIY Workout Shirt
Makes 1 sexy little tank

Ingredients:
1 old T-shirt
1 pair of scissors
20 minutes

1. Start with a pre-washed T-shirt. Any old shirt will do! The bigger the better.

2. Cut away the ribbed neckline and bottom hem. For the sleeves, cut downwards starting from the shoulder, determining how thick you want your straps. Cut straight down and then begin to curve down below the armpit seam.

3. Determine how low you want your front neckline, and cut away.

4. Flip the shirt over and make a narrow racerback, curving inward from the armpits.  Then cut a deep “V” shape from the top neckline.

5. Using the excess bottom hemline, stretch it out until it becomes one long string of fabric. Knot the string a couple of inches above the bottom of the “V” shape.

6. Wrap the string all the way down around the center of the racerback, and back up to meet the other ends. Knot the ends together tightly. Trim the loose ends.

7. To give your tank a high-low look, lay your shirt sideways, flattening it out evenly. Starting a few inches up at the front of your shirt, start cutting diagonally until you reach the back.

Throw it on with some cute yogis, grab your water, and hit the gym!
Post or email your photos if you make a shirt! I can’t wait to see your creations!

If you loved this DIY, you may also like my DIY Multi Strand Scarf! No sewing required!