easy

Kale Chips

Hi Everyone! I hope that you guys had an awesome 4th of July holiday yesterday!
It was so gloomy here yesterday, but the beach was still packed with people!

Today’s recipe is something that I am obsessed with: Kale Chips! I eat them all the time and they are always a staple in my pantry, but for some reason, I completely neglected to post a recipe on my blog! I make them so often, that I’m surprised this wasn’t my very first post haha If you don’t like the bitter taste of raw kale, you should give Kale Chips a chance, because they taste totally different when baked!
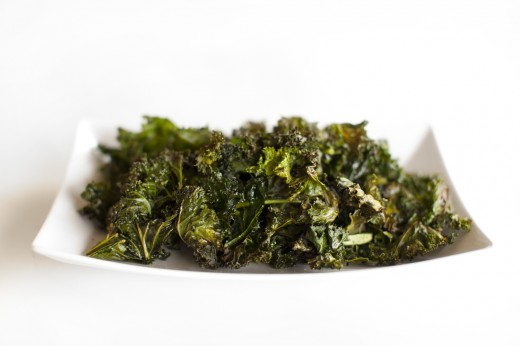

Kale Chips are really easy to make and are so affordable! I’ll start you guys off with a very basic Kale Chip recipe so you can experiment with your favorite spices and perfect the baking process before I get into some more advanced “cheesy vegan” options in future posts. If you are someone who craves crunchy cracks, these will be your new best friend. This is the perfect guiltless snack made from only 3 ingredients that are so healthy you could eat the entire batch!

It’s time to get to know this leafy green, so all hail the KALE!

  • One cup of kale has only 36 calories and zero grams of fat.
  • One cup contains nearly 20% of the RDA of dietary fiber, which promotes regular digestion.
  • Kale is contains carotenoids and flavonoids, two powerful antioxidants that protect our cells from free radicals.
  • Contains anti-inflammatory properties
  • Provides a high dose of vitamin K (providing 1327% of the RDA in one cup), which strengthens the composition of our bones.
  • Contains over 192% of the RDA of vitamin A in one cup, which is an effective antioxidant, that helps boost immunity, and helps maintains healthy bones and teeth.
  • Contains Vitamin C, a powerful antioxidant that helps to lower blood pressure, and ensures a healthy immune system.

Baking kale chips or any vegetables for that matter reduces some of the nutritional properties of the whole food,  so it is suggested that you use a dehydrator to preserves the nutrients and enzymes that help with energy and digestion. If you have a dehydrator, you could use this recipe and dehydrate at 115° for 8-12 hours. Don’t be afraid of losing some of the nutritional value during baking if you only have access to an oven… Kale Chips are obviously a much healthier option than greasy potato chips!
Kale Chips
Serves 3-4

1 bunch curly kale
1 Tbsp olive oil
1/2 tsp ground sea salt or seasoning salt to taste (one of my favorites is Lawry’s)

Preheat oven to 350 degrees. Rinse and dry kale leaves. Remove kale leaves from stems. Place the leaves in a mixing bowl and drizzle with olive oil. Massage the kale until the olive oil is evenly coated onto the kale. Place kale directly onto a baking sheet and sprinkle with sea salt or seasoning. Don’t worry about perfectly spacing out the Kale chips on the baking sheet, they can slightly overlap because they will shrink dramatically in size. Place the baking sheet in the oven and bake for 10-15 minutes or until crisp, moving the chips around and flipping them half way to ensure that they are evenly baked.
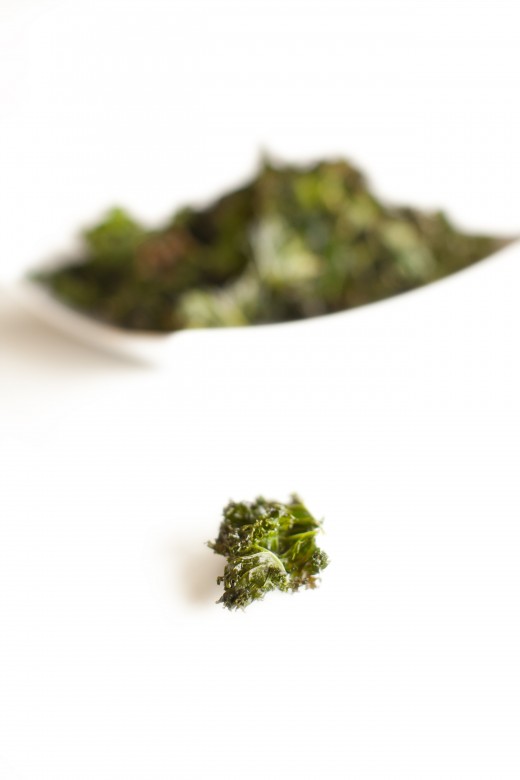
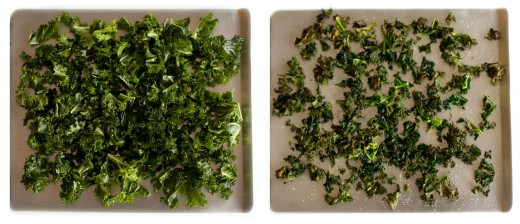
Note: Kale chips shrink after they are baked, so let the leaves be bigger than you would like them to be before baking. Below is a photograph of the kale chips before and after the baking process.

If you want a full nutrient rich dose of kale, try it raw in a green smoothie!

Patriotic Toast

Happy almost Independence Day and official Toast Tuesday!

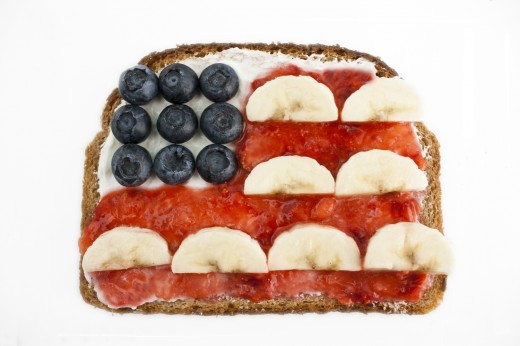
4th of July is upon us and it’s time for some fun in the sun, barbecuing, and fireworks! Start your morning off right with this adorable American flag toast! I originally saw this toast idea floating around Pinterest last week and just had to make it. The only problem? I’m deathly allergic to the red & blue ingredients… Booooo (more on the allergy subject later)! I can’t have white toast, no fun! I decided I would make myself a star shaped slice of toast with some PB so I can join in on the fun when I make this for my friends tomorrow. Back to the American flag cuteness, whoever thought of this is a genius. What a cute idea for kids… and adults!


I’ll be taking tomorrow off to celebrate the holiday and I wish everyone a fun and safe 4th of July! Be smart and wear your sunscreen, Skin Cancer does not discriminate.

Patriotic Toast
serves 1 

1 slice whole wheat bread
1 Tbsp nonfat cream cheese
1 Tbsp strawberry jam
9 blueberries
4 banana slices (halved)

Toast the bread and spread evenly with cream cheese. Place the blueberries in 3 rows of 3. Spread the strawberry jam over the rest of the toast and create stripes with the banana halves.

DIY Workout Headband

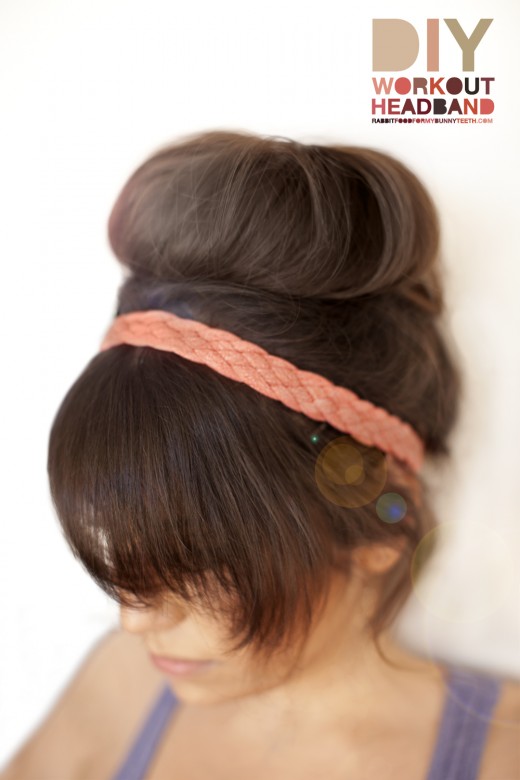
Happy Fashion Friday, and welcome to my third Workout DIY!
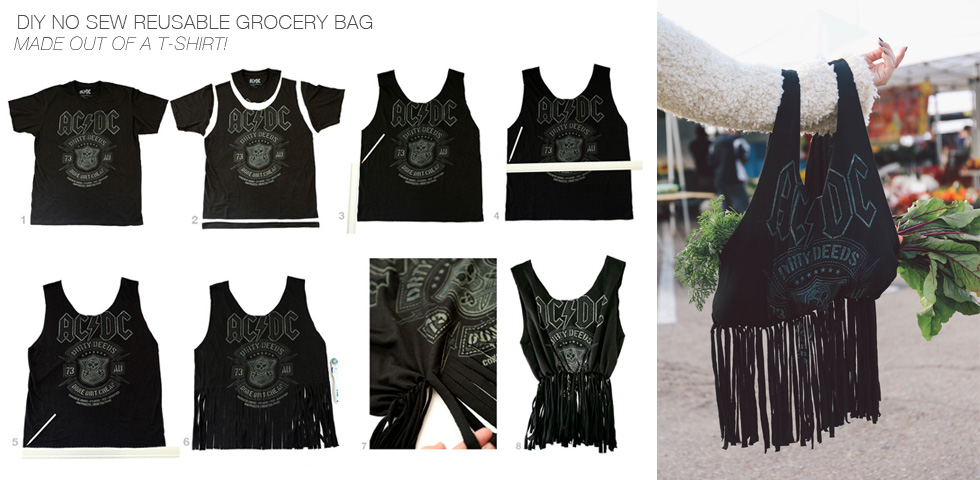
If you’ve already made my DIY Workout Shirt and DIY Multi-Strand Scarf you can now complete your look with a DIY Workout Headband! Keep your bangs or little whispy hairs out of your face during an intense sweat session, or hit the yoga studio in style with this super cute five strand braided headband!

Who doesn’t’ want to be decked out from head to toe in homemade RFFMBT no-sew workout clothes?!
DIY Workout Headband
Makes one chic headband
You could make up to 3 headbands depending on the size of your shirt & amount of fabric left! 

Ingredients:
1 old T-shirt
1 pair of scissors
1 piece of tape
30 minutes

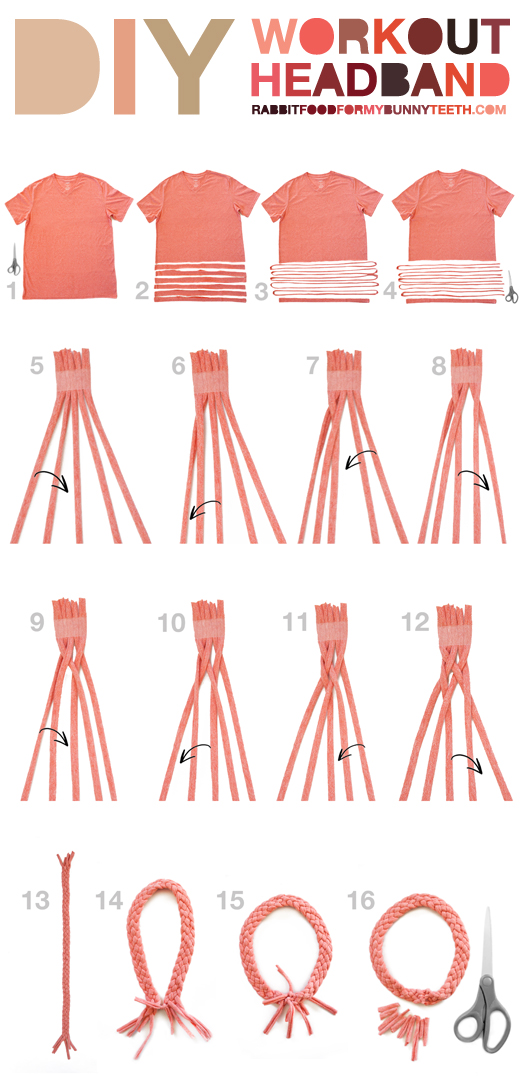
1. Start with a large T-shirt. Any old shirt will do! Seamless is a plus!

2. Cut off the bottom hem of the shirt. Then cut five 1in wide strips horizontally across the shirt starting from the bottom. You can use a ruler to guide a straight line across the shirt, but don’t worry if they aren’t perfect.

3. Set the bottom hem aside. Stretch all of the remaining strips until they become long, and the raw edges start to roll inwards.

4. Cut the five strands in half so they become long strands (instead of circles).

5. Gather the five strands, and secure them onto a hard surface with tape. This will make it easier for you to braid. Take the outside left strand and place it one over to the right.

6. Take the middle strand and place it one over to the left.

7.  Take the outside right strand and place it one over to the left.

8. Take the middle strand and place it one over to the right.

9.  Have you noticed the pattern? outside over one to the right, middle over one to the left, outside over one to the left, middle over one to the right … work from the left three strands, to the right 3 strands. Keep repeating these steps (9-12 are the same as 5-8)! Take the outside left strand and place it one over to the right.

10. Take the middle strand and place it one over to the left.

11.  Take the outside right strand and place it one over to the left.

12. Take the middle strand and place it one over to the right.

13. Once you have finished braiding, trim the headband to fit your head, leaving about an inch on each end for knotting.

14. Start by double knotting one strand from each end of the braid together.

15. Match each end with another strand from the opposite end and double knot.

16. Trim the ends off of the double knots, and you’re done!

Tadaaaa! A chic headband for your next workout! You could even make 2 or 3 headbands out of one shirt, woo!
Post or email your photos if you make a headband! I can’t wait to see your creations! 

Banana Bread Breakfast Quinoa + DOLE Bananas Giveaway

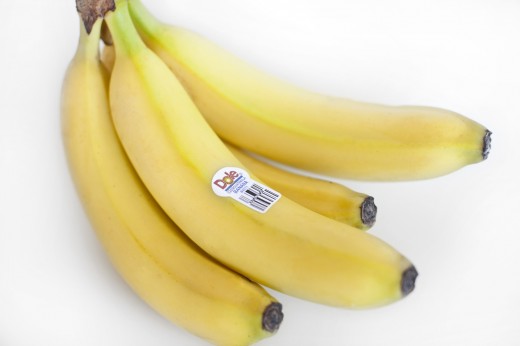
A couple of weeks ago, I received an email from DOLE Bananas asking if I would like some coupons for free bananas. After the shock that DOLE Bananas (OMG!) emailed me, of course I immediately replied with a very enthusiastic YES! DOLE Bananas was sweet enough to send me a huge stack of coupons for bananas, and let me say, they were instantly put to good use! I have been going bananas in the kitchen, literally! I picked up tons of bananas and threw a bunch (no pun intended) in the freezer (peeled) for future smoothie use, and started crafting away on some new nana recipes for you guys!

Bananas have so many health benefits, they might as well be called “Nature’s Original Energy Bar!” DOLE sent me some awesome banana facts to show that they aren’t just delicious, but nutritious too!

  • Bananas are a good source of vitamins and nutrients – especially vitamins B6 and C, potassium, manganese and dietary fiber.
  • Bananas replenish necessary carbohydrates, glycogen and body fluids burned during exercise; contain electrolytes; and are the perfect alternative to processed sports drinks and bars packed with sodium and sugar.

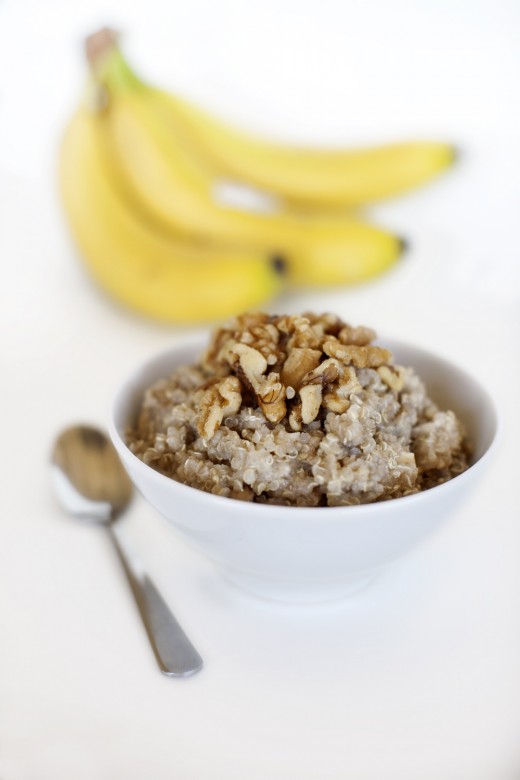
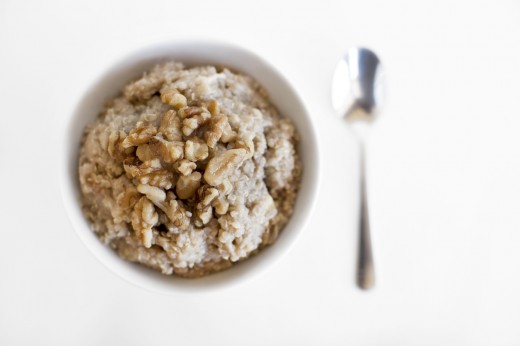
Since I am a huge fan of bananas and breakfast, I wanted to try making a banana bread type of oatmeal… without the oats! I love quinoa for it’s amazing health benefits, so I decided to use it as a breakfast bowl/porridge type of meal. It turned out AWESOME, and I will be making this more often, especially when I need a break from oatmeal!


Banana Bread Breakfast Quinoa
Serves 1

1 very ripe banana – mashed
¼ cup dry quinoa
¼ cup almond milk (or milk of your choice)
2 Tbsp walnuts
½ tsp pure vanilla extract
¼ tsp cinnamon

Cook the quinoa on the stove to package instructions. After the quinoa has finished cooking (while over low heat), stir in the almond milk, mashed banana, vanilla, and cinnamon. Mix the walnuts into the quinoa or add on top. Transfer to a bowl and enjoy warm.
Note: You could add additional milk until desired texture is reached.

The Rabbit Food Pyramid Breakdown
Produce: banana
Whole Grain: quinoa
Protein: milk
Plant Based Fat: walnuts

In collaboration with DOLE Bananas, I am hosting a giveaway of  “$1 off DOLE Bananas” coupons for 5 lucky winners! Each winner will receive 5 coupons! 

For your chance to win:

  • Leave a comment on this post “Banana Bread Breakfast Quinoa + DOLE Bananas Giveaway” with your favorite way to eat bananas!
  • All entries must use a valid email address.
  • Open to U.S. residents only.
  • All comments must be posted by Sunday, July 1st at 11:59pm (PST).
  • 5 winners will be randomly selected and announced on Monday, July 2.

Go Bananas Every Day™ and receive daily recipes, serving suggestions and tips by following DOLE Bananas on Twitter and Facebook!

I have complied a list of some RFFMBT recipes that include bananas:
Healthy Vegan Banana Bread
Banana Nicecream
Peanut Butter & Banana Toast
Banana Hazelnut Toast With Ricotta
Protein Pancakes
Chocolate Cake Batter Overnight Oats
Ch Ch Ch Chia Pudding
Carrot Cake Smoothie
Gargantuan Green Giant
It’s Easy Being Green Smoothie

* The giveaway has ended, and the winners will be announced on Monday, July 2.
** Congratulations to the winners: Killian from PA, Jessica from IL, Sara from VA, Elizabeth from TX, and Leanne from CA.

Cauliflower Pizza

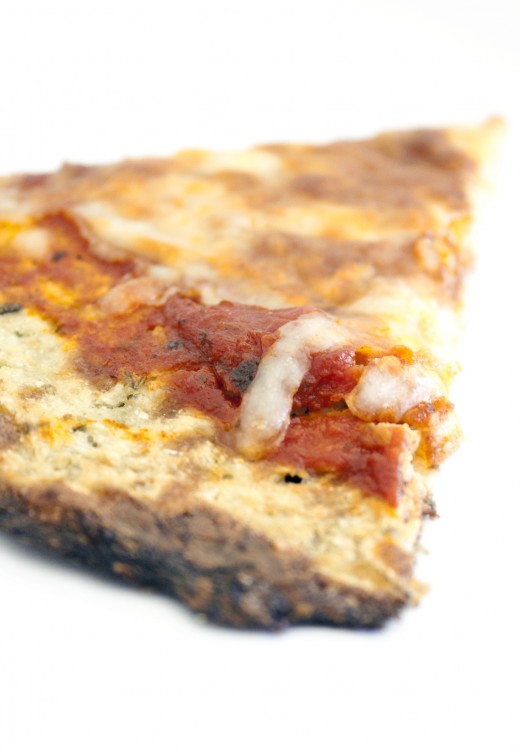
This is one of my favorite recipes. It’s really fun to make, and if you didn’t make it yourself, you would have absolutely no idea that it was made from cauliflower. This pizza is a great low-carb option that doesn’t omit any flavor. Your guests or kids will never know they are eating a pizza made of vegetables!

Cauliflower Pizza
Makes one 9-12in pizza – 6 slices

Crust:
2 cups shredded cauliflower
1 egg
1 cup finely shredded reduced-fat mozzarella cheese
1 tsp dried oregano
1/2 tsp garlic powder
1/4 tsp salt

Topping:
1/2 cup piza sauce or marinara sauce
1/2 cup finely shredded mozzarella cheese
topping of choice


Preheat the oven to 450 degrees. “Rice” or “shred” the cauliflower in a blender until it resembles small crumbled rice/pieces, but not pureed. Using a few pieces of paper towel, ring the excess water out of the cauliflower. Place the cauliflower crumbles in a mixing bowl and combine with egg, mozzarella, oregano, garlic powder, and salt. Mix with a spatula until well combined. Generously coat a baking sheet with nonstick cooking spray spray (this crust is known to stick). Place the dough on the baking sheet and press into a 9 to 12-inch round crust. Lightly spray the crust with nonstick spray and bake for 20 minutes or until golden. Remove the crust from the oven and turn the heat to broil. Spread the sauce on top of the baked crust, leaving a half inch border around the edge. Sprinkle mozzarella on top of the sauce. Add any extra toppings at this time. Place the pizza back in the oven and broil for 3 to 4 minutes, or until the cheese is melted and bubbly. Remove pizza from the oven and cut into 6 slices and serve hot.

1 9 10 11 12