easy

Portobello Pizza

Hoppy Monday all!
Last week I had the opportunity to attend the Bard Valley Natural Delights Medjool Date Summit in yuma, AZ! I had incredible time learning about the harvesting process and taste testing delectable recipes that I MUST share with you guys! I also met some new friends that I already miss since departing on Friday! Wahhhh. I’ll be giving you guys a full rundown of the blogger summit later this week. I cannot wait to tell you about my trip!

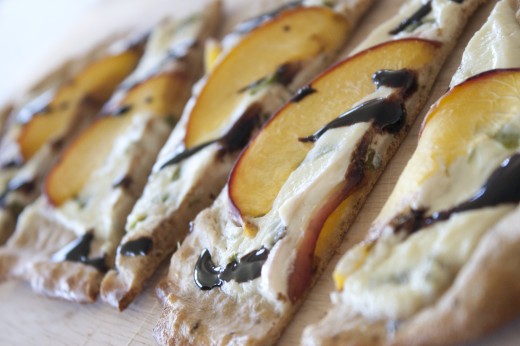
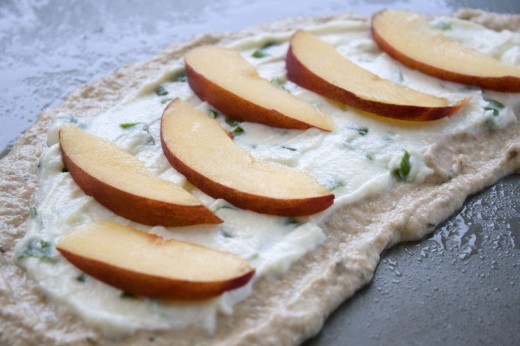
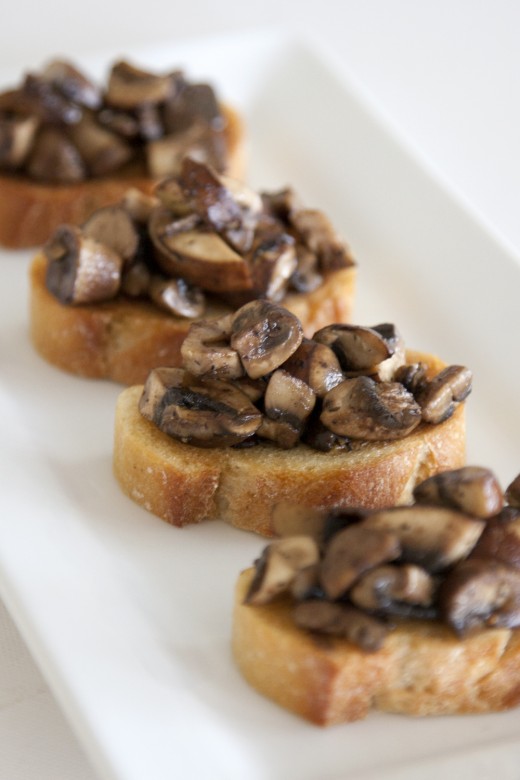
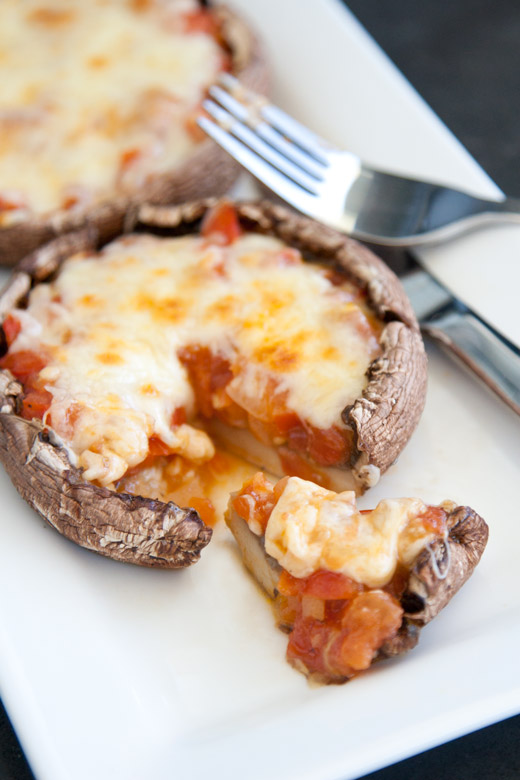
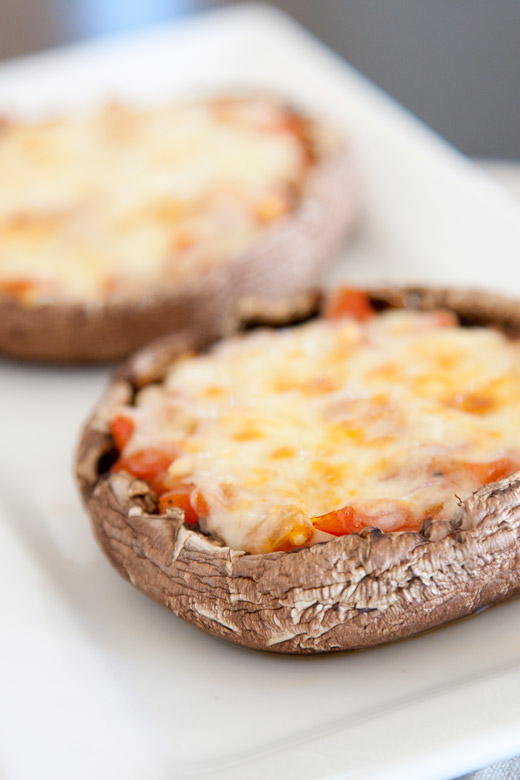
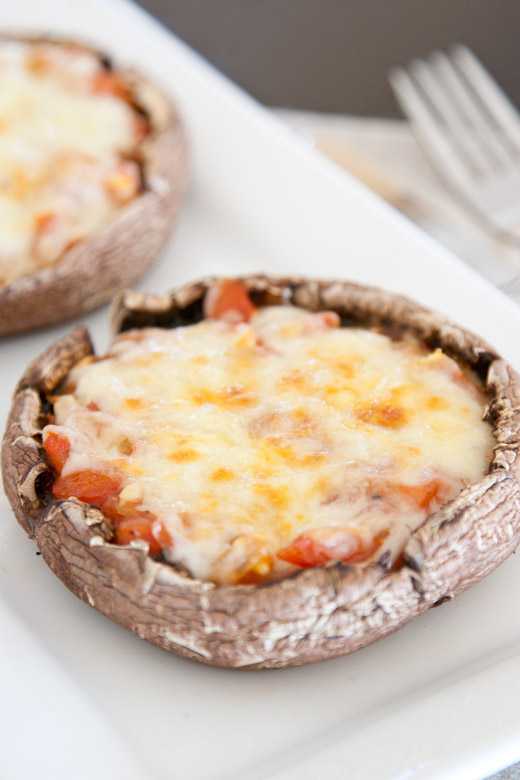
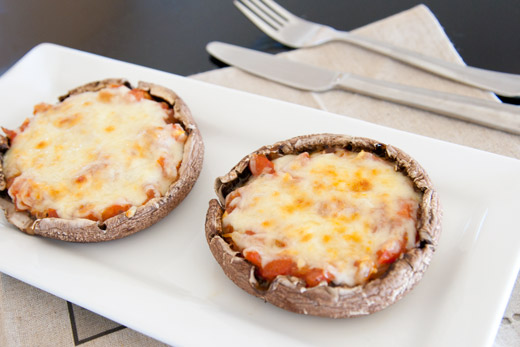
Today’s recipe is a Portobello Mushroom Pizza!
Loaded with veggies, this pizza is low-carb, gluten-free, and super filling!
Bon Appétit!
Portobello Pizza 10
Portobello Pizza 9
Portobello Pizza 1
Portobello Pizza 2
Portobello Pizza 3
Portobello Pizza 4
Portobello Pizza 5
Portobello Pizza 6
Portobello Pizza 7
Portobello Pizza
Serves 1

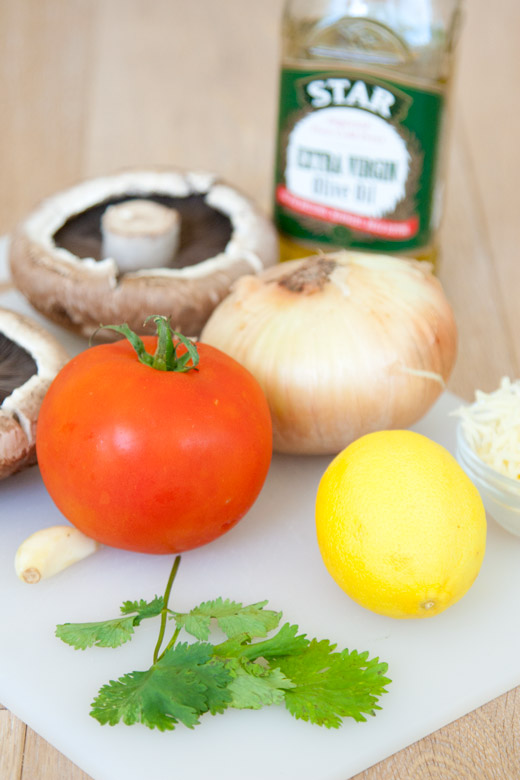
2 large portobello mushrooms
1 tomato
1/4 cup reduced fat mozzarella cheese
1/4 cup chopped onion
1 Tbsp olive oil
1 tsp lemon juice
1/2 tsp minced garlic
pinch of salt
pinch of pepper

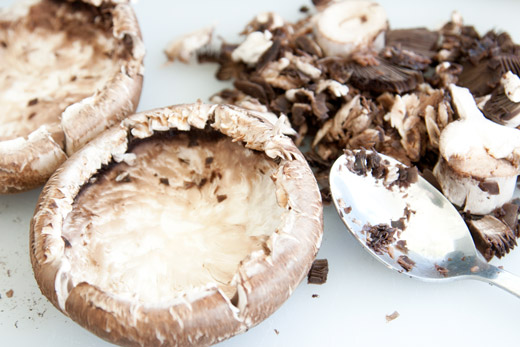
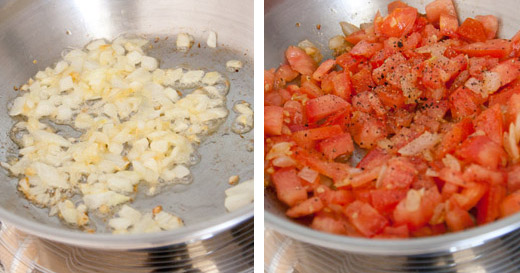
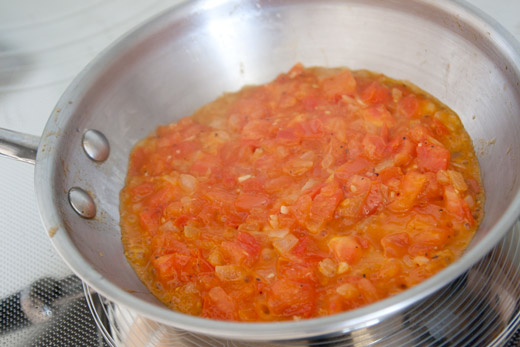
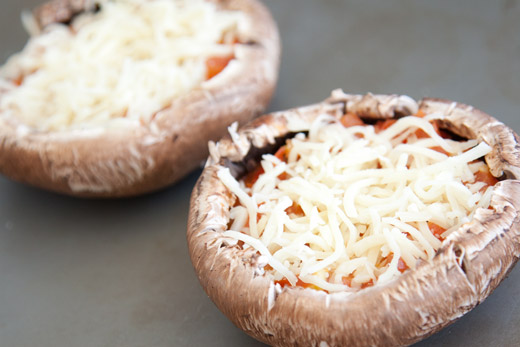
Preheat oven to 400 degrees. Chop onion and mince garlic. Pour olive oil into a saucepan over medium high heat and add onions and garlic. Cook onions and garlic until they are slightly browned. Dice tomato and add to the saucepan along with salt, pepper, and lemon juice. Bring the sauce to a simmer and cook for 3-5 minutes. Remove gills from the portobello mushrooms by scraping with a spoon. Place portobellos on a baking sheet coated with nonstick cooking spray. Pour the sauce into each portobello and top with cheese. Bake for 12 minutes. After 12 minutes, set oven to broil for 30 seconds to 1 minute to brown the cheese. Remove from the oven and enjoy!
Tip: I suggest lining your baking sheet with foil and coating the foil with nonstick cooking spray for an easier cleanup. The portobello mushrooms tend to get pretty juicy will cooking!

In a hurry? You can always use organic tomato sauce in place of the homemade sauce! I would recommend about 2 Tbps of store-bought sauce per portobello pizza.

Vegan? Use a vegan cheese substitute such as Daiya Mozzarella Style Shreds!

Portobello Pizza 8
The Rabbit Food Pyramid Breakdown
Produce: portobello mushrooms, tomato, onion, garlic
Whole Grain: none
Protein: reduced fat mozzarella cheese
Plant Based Fat: olive oil

Baked Eggplant Fries

I’ve never been a fan of potato french fries. I’m actually not a fan of potatoes in general, with the exception of the occasional sweet potato. I decided that I wanted to make a healthy french fry alternative with a purpose. No oils, frying, or heavy starchy ingredients here!  These healthy eggplant fries are baked to perfection in a crispy golden flax-almond breading. Now I know what half of you are thinking. “Ewwwww eggplant!” I think a lot of my friends are turned off by the mushy texture of cooked eggplant, but trust me this is totally different! Even if you HATE eggplant, I am almost positive you will love these fries! You have to give them a try, pretty pretty please! Of course if you’re super anti-eggplant, zucchini would be a great alternative as well.

They’re perfectly crispy, delicious, and nutritious!
Made from flaxseed, almond, whole wheat flour, and spices, these oil-free baked fries deliver tons of micronutrients, healthy plant-based fats, and fiber. So good for you, you can eat them alllll without any worry!

Baked Eggplant Fries

Ingredients:
1 small eggplant
1/4 cup egg whites

Breading:
1 Tbsp ground flaxseed
1 Tbsp almond meal/flour
1 Tbsp whole wheat flour
1/2 tsp garlic powder
1/2 tsp onion powder
1/4 tsp cumin
1/4 tsp pepper
pinch of salt

Preheat oven to 400 degrees. Combine all of the breading ingredients in a bowl and mix together. In a separate bowl, beat 1/4 cup of egg whites and set aside. Cut eggplant into 1/2 inch thick fries (I removed the skin but you don’t have to). Transfer the breading mixture to a plate. Dip each piece of eggplant individually into the egg whites, and then roll in the breading mixture. Place the breaded fries onto a baking sheet lined with parchment paper. Bake for 10 minutes, flip fries, then bake for an additional 10 minutes until golden and crispy.

Excellent when dipped in fresh marinara!

Single Serving PB Cookie

Hoppy Fridayyyyy my little bun buns!

A few of you have asked me for more before and after photos because they help you to stay motivated and on track. I searched my computes for quite some time to find old photos, but noticed that I don’t have too many full body pictures of myself. I was usually very covered up or couldn’t stand photos of myself, so I deleted them. Anyways here is another before and after to show you guys what rabbit food can do for your body! I hope that this can inspire you guys to eat more rabbit food!
Before & After
So last week I said that I was going to go prop shopping for my kitchen/blog photos. That semi-happened, but I literally cannot get away from black and white props! It’s my fav! The Coco Chanel kitchen lives on!

I love love love dessert. I get my sweet tooth from my mom, who can literally eat candy and cookies like there’s no tomorrow and maintain her petite frame. I wasn’t blessed with that same gene, but man I love me some sugaaaa! I’m the kind of person that cannot live without dessert or a little something sweet every day. Instead of traditional store bought cookies loaded with oil, salt, refined sugar, and bad saturated fats (not to mention the totally addictive-cannot-stop-eating-one-after-the-other feeling that comes along with them!), I took to my kitchen to give an old fav a healthy spin! I wanted to make a super clean, healthy, peanut butter cookie that can be enjoyed with coffee and good conversation. Something that feels indulgent and naughty, but is actually quite filling and good for you!

Believe it or not, this recipe only calls for 7 ingredients that you probably have in your kitchen already!

Single Serving PB Cookie
Serves 1

1 Tbsp almond flour
1 Tbsp coconut flour
1 Tbsp creamy peanut butter
1 Tbsp unsweetened almond milk
1/2 Tbsp egg whites
1/2 tbsp chocolate chips (or 1 tsp mini)
1 packet stevia

Combine all ingredients in a bowl and mix until well combined. Spread the dough onto a microwave safe plate and flatten into a cookie shape. microwave for 1:15-1:30 minutes.

Single Serving PB Cookie

Rustic Ricotta & Peach Pizza

Everyone loves pizza, right?
And homemade pizza? Even better!
What if I told you that you could have this entire pizza, for yourself?
That’s right, this homemade pizza is personal sized!
Dough and all, from scratch – following The Rabbit Food Pyramid!

Grab your ingredients, preheat your oven, and get ready for the best pizza of the summer!
My Italian side is very happy with this little creation!

Rustic Ricotta & Pear pizza

Rustic Ricotta & Peach Pizza
Serves 1

Dough:
¼ cup whole-wheat flour
1 egg white
1 Tbsp almond milk
½ tsp oregano
pinch of salt
pinch of pepper

Ricotta mixture:
1/4 cup nonfat or lowfat ricotta cheese
1 Tbsp scallions (or chives), chopped
1/2 Tbsp lemon juice
1 tsp olive oil

Toppings:
1/2 peach, thinly slices
1 tsp balsamic glaze

Preheat oven to 450. Combine all of the dough ingredients and mix well. Generously spray a baking sheet with nonstick or olive oil cooking spray. Thinly spread the dough on the baking sheet. In a new bowl, combine the ricotta ingredients and mix well. Spread the ricotta over the uncooked dough, leaving 1/2 inch of the outer edge for crust. Thinly slice 1/2 of a peach and place slices over the ricotta. Transfer the pizza to oven and bake for 12-13 minutes or until edges become golden brown. Remove from oven and drizzle with balsamic glaze. Cut and serve hot.

The Rabbit Food Pyramid Breakdown
Produce: scallions and 1/2 peach
Whole Grain: whole grain flower in the pizza dough
Protein: ricotta cheese and egg white
Plant Based Fat: olive oil

Easy Peasy Mushroom Crostini

Hi everybunny!
Sorry for the lack of post yesterday… but I have good news: New RFFMBT shirts are almost here! Keep checking back because I am hoping to have them listed in the shop later this week! I will make an announcement via my blog, Instagram, Facebook, and Twitter when they are ready for purchase! I have a couple of new designs that I’m really excited for you guys to see as well as my famous “Eat More Rabbit Food” shirts!

Oh My Goji Shirt
Remember when I used to do Toast Tuesdays?! Today’s recipe kind of brings that back to the blog… in a super sophisticated toast way haha. Here’s to this small bite for Toast Tuesday!

Whether you’re entertaining guests, in need of a quick snack, or looking for a simple appetizer for dinner with your family, these Mushroom Crostini are easy peasy to make! I find myself loving the most simple of recipes because you get to experience so much of one flavor in a single bite. These minimal ingredient mushroom crostini were inspired by my trip to the Mycopia Mushroom Farm and are full of earthy flavor and the perfect amount of crunch and chewiness. The flavor of mushrooms cooked in olive oil, salt, and pepper is like no other. Simple, and delicious.

Easy Peasy Mushroom Crostini

Easy Peasy Mushroom Crostini
Serves 1 – when making this recipe for guests, the more mushrooms the merrier!

4 slices of whole grain baguette, 1/2 inch thick slices
1 cup chopped baby bella mushrooms
1 Tbps olive oil
Pinch of salt & pepper

Preheat oven to 350 degrees. Lay sliced bread on a baking sheet and spray each piece with olive oil cooking spray. Bake for about 15 minutes or until they begin to turn golden brown. While the crostini cook in the oven, heat olive oil in a skillet. Add the mushrooms and cook for about five minutes until they become soft. Sprinkle with salt and pepper and toss well. Transfer the mushrooms and top on the whole grain crostini. Serve.
Note: I like to use olive oil spray to lighten up my crostini bread. Especially since there is already a serving of olive oil mixed in with the mushrooms! It’s a lighter way to get your bread crispy.

The Rabbit Food Pyramid Breakdown
Produce: mushrooms
Whole Grain: baguette slices
Protein: suggestion – complete this meal with a side of 1/2 cup cooked lentils, chickpeas, or beans!
Plant Based Fat: olive oil

1 2 3 4 5 12