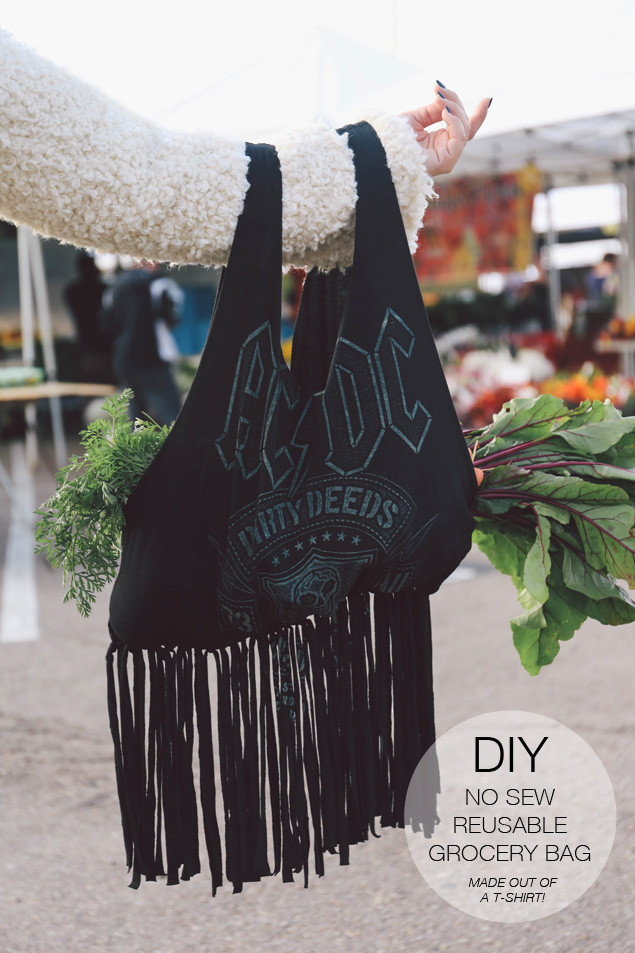
 I haven’t done a “Fashion Friday” DIY for sooooo long, and since it’s a new year, it’s definitely time! This DIY was inspired by Cassey from Blogilates! I always have my car stocked with reusable shopping bags for last minute farmer’s market and grocery shopping trips, and thought this “do it yourself” bag/tote was the cutest addition to my collection. You can use any old T shirt (the bigger the better!) but I decided to buy an ACDC shirt from Target to give my bag a chic rocker look! I’m absolutely obsessed with how it turned out and got stopped a couple of times at the North Park Farmer’s Market in San Diego to ask where it was from (major points!)!
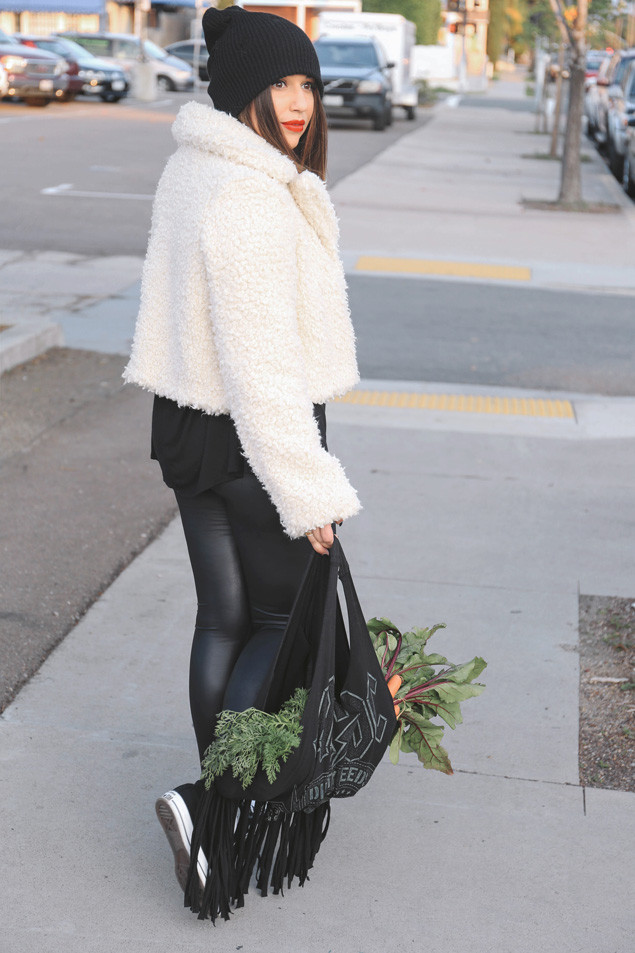
 Jacket: c/o Smythe (on sale 65% off & free shipping!) | Leggings: American Apparel | Shoes: Converse | Beanie: Ebay (black) | | Lip Liner: Mac ‘Cherry’ | Lipstick: Lime Crime ‘Red Velvet’
My favorite part about this DIY is that it’s a no sew project! No needle, thread, or sewing machine required! All you really need is a pair of scissors and an old T shirt, but if you are a perfectionist like me, a white or colored pencil, ruler, and rotary cutter, will do the job just perfectly! If you are super crafty and looking for a rotary cutter, cutting mat, and ruler set, this one by Fiskars is amazing!

 I’m obsessed with my new Faux-Fur Cropped Jacket by Smythe! It’s faux shearling with a huge oversized collar that is seriously way too cute. I’ve been wearing it nonstop since they sent it to me! I also just found out that it’s on sale at Neiman’s for 65% off, which is INSANE! Oh and did I mention they are offering free shipping? Unreal.
 DIY Grocery Bag
Ingredients
T-shirt (the bigger the better)
white or colored pencil
scissors or rotary cutter
ruler
cutting mat
Directions
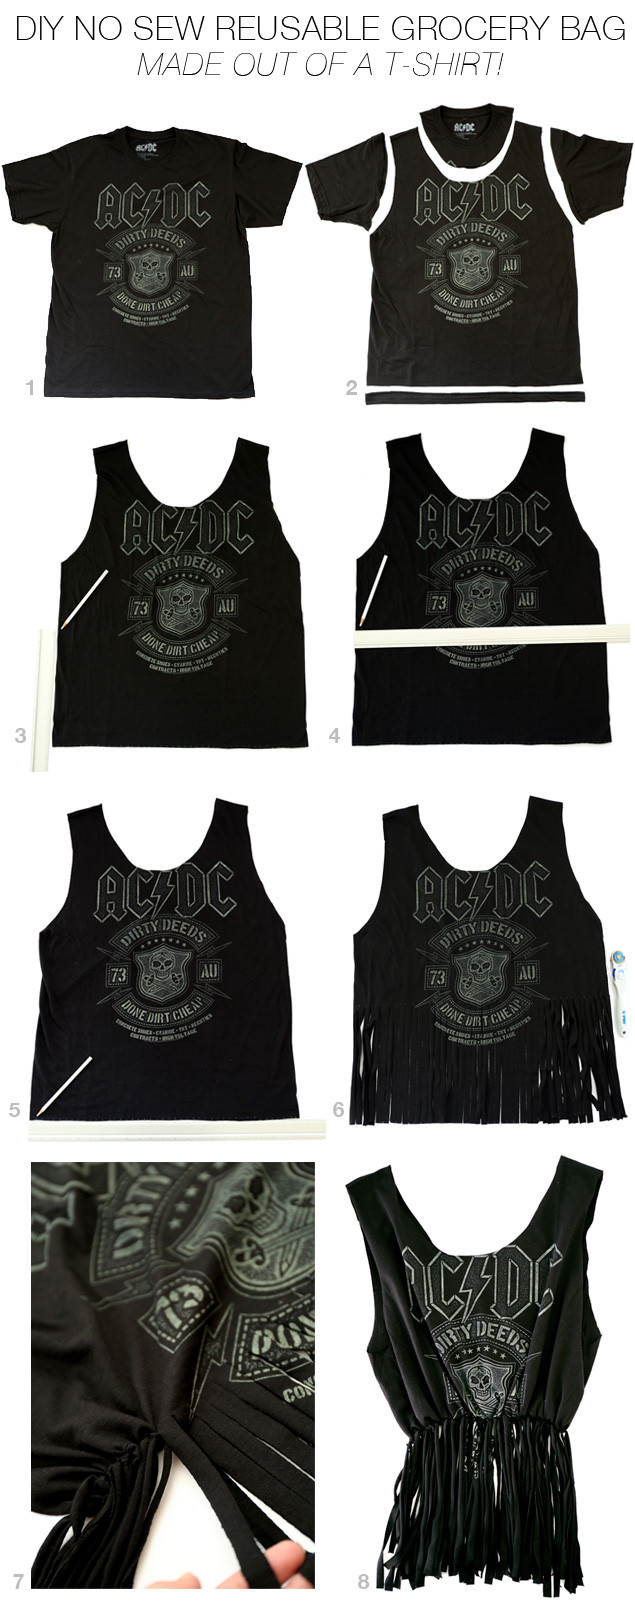
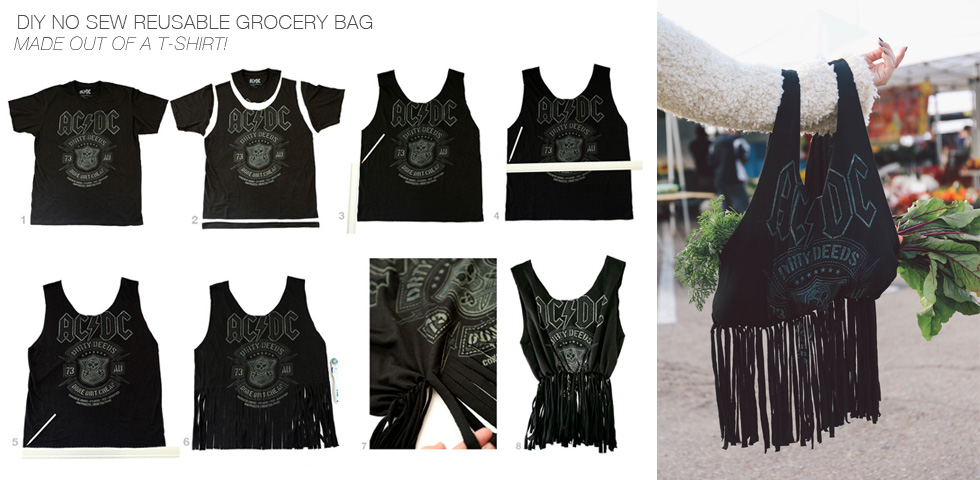
1. Get a large T shirt and lay it flat.
2. Cut off the neck (about 2-3 inches below the neck hemline), sleeves, and bottom hem.
3. From the bottom of each arm hole, measure down 6 inches and make a mark. This is where the bottom of your bag will be, and your fringe pieces will start.
4. Line your ruler up horizontal across the shirt from both marks that you just made. Start marking small dots/lines 1/2 inch apart all the way across the entire width of the shirt. This marks where each fringe will be cut.
5. Place the ruler horizontally across the bottom of the shirt and mark small dots/lines every 1/2 inch all the way across (the same way you just did in step 4). This will help you to get perfectly aligned/straight fringe pieces.
6. Using scissors or your rotary cutter and ruler, cut from the top dot, straight down to the aligning bottom dot (through both layers of fabric). Work from left to right until all of the fringe has been cut.
7. Once all of your fringe pieces have been cut, double knot both of the corresponding front and back pieces of fabric together. This will seal up the bottom of your bag.
8. Voilà, Your grocery bag is complete! For even longer fringe and more sealed up edges of your bag, stretch out your fringe and handles!
Note: If you don’t want to go through all of the marking and aligning with a ruler, you can totally freehand it and make bigger fringe pieces with scissors. I personally think it looks best when you take the time and measure out the small 1/2 inch fringe pieces, but it’s still an awesome and fun DIY no matter how you do it!
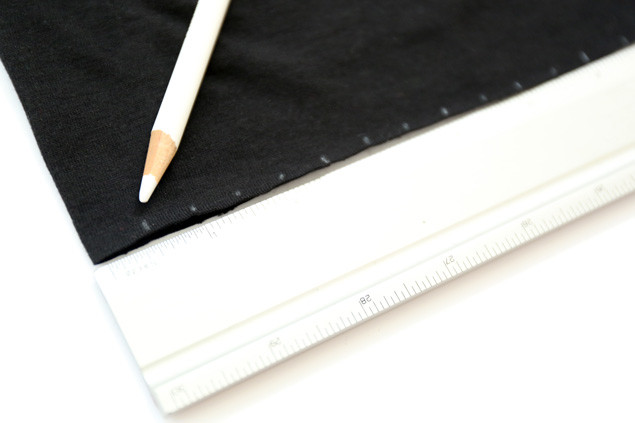 Above is an example of the dots 1/2 inch apart along the bottom of the fabric.
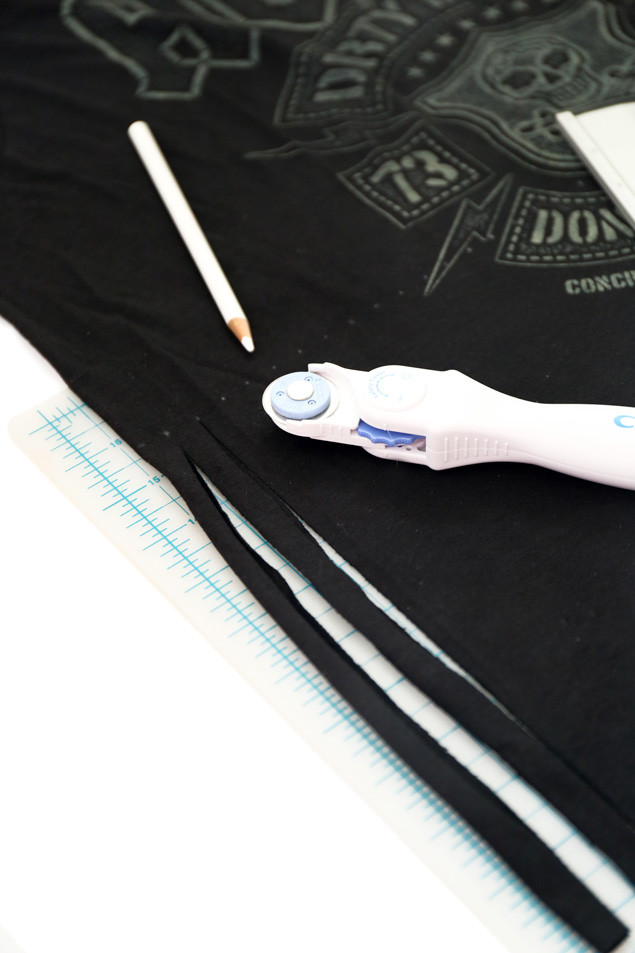 Cutting from top to bottom dot.
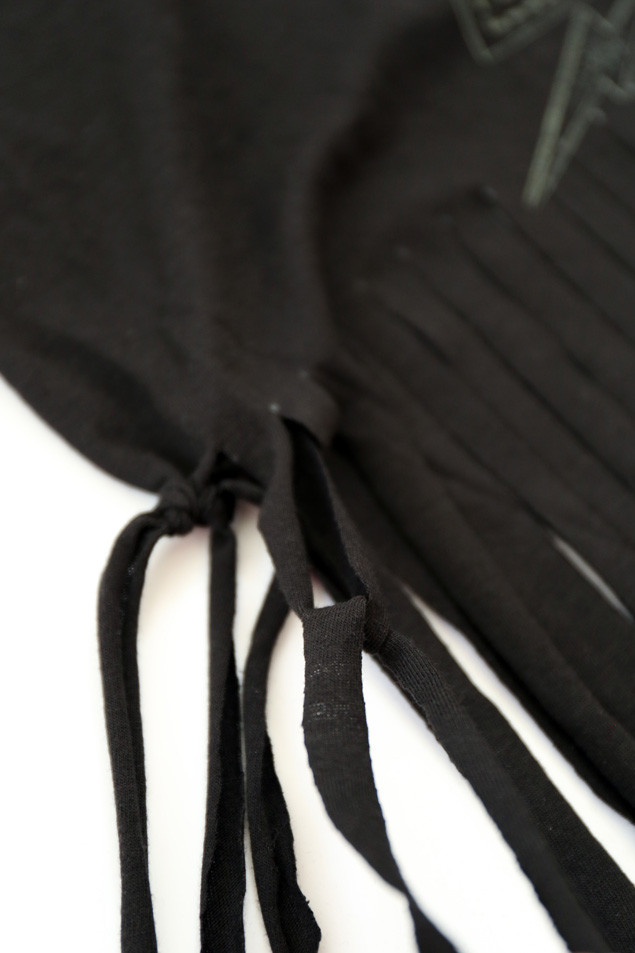 Double knotting the fringe pieces.
 So cute! Grocery shop away!
This is a really fun project to do with friends for a girls night in, and it also makes a super cute gift!
Health & Happiness
![]()



Stephen Dolle Neurosciences
January 9, 2015 at 3:15 pm (11 years ago)Great idea. I’ve shared it with my groups who do advocacy & awareness for the disorder hydrocephalus. If you know of an online co. that makes ea. silk screen decals for making our own t-shirt art & bags, let me know. Thanks
Catherine
January 9, 2015 at 6:03 pm (11 years ago)Thank you! Wow, it’s so great to see a comment from you. My best friend has hydrocephalus! She actually worked for the Hydrocephalus Foundation for a while 🙂 As for an online company that can put your logo on shirts and bags, Zazzle.com or Vistaprint.com are great options! You can also find promo codes online for both sites to get great discounts!
Stephen Dolle Neurosciences
January 10, 2015 at 11:29 pm (11 years ago)Hey Catherine. I feel like a birdie! After searching around, I think the the best solution for making t-shirt/bag art is printing it on Avery paper 3279 or 3271 (6 sheets for about $10). You just need color toner in your printer. Endless possibilities! I make custom clothing on VistaPrint. So is similar work with graphic art! I created a fun site for hydrocephalus at http://www.HydroPowered.org w/ some art & super hero stories. Share with your best friend.
LW
January 10, 2015 at 1:49 pm (11 years ago)Your share on pintrest link is not working.
Catherine
January 10, 2015 at 3:11 pm (11 years ago)Thanks for letting me know, LW! It’s working on my end, what does it do when you click it?
Cathy
January 27, 2015 at 4:29 am (11 years ago)Pretty cool! But how could you cut an ACDC Shirt?! Oo
That just breaks my heart a little.
Greetings from Germany 😉
Catherine
January 27, 2015 at 4:34 pm (11 years ago)Hahaha!!! It did go to good use though! <3
katiecburry
March 27, 2017 at 8:26 pm (9 years ago)This is so cool!! I’ve been trying to be better about using reusable bags instead of plastic and this is a great way to get another bag!
Thanks so much for sharing!