DIY

DIY Multi-Strand Scarf


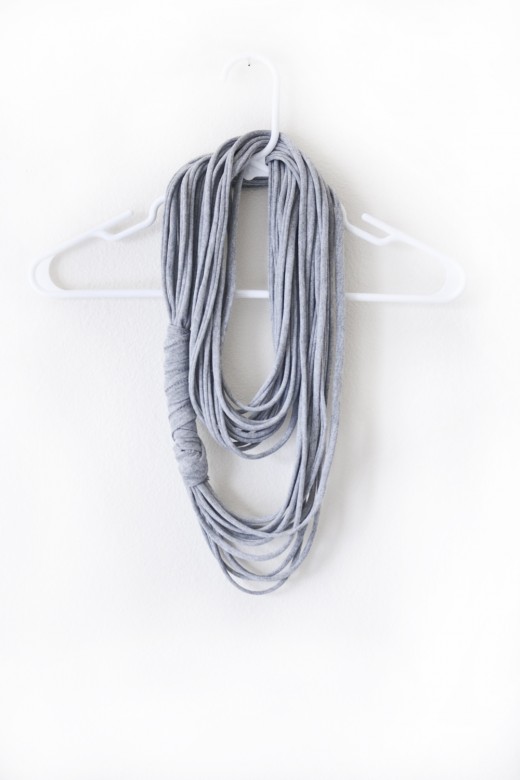
I am a huge fan on no-sew projects from recycled clothing. If you were a fan of my no-sew DIY Workout Shirt, you will enjoy this one as well. Plus they will look très chic when worn together! Behold, a scarf that is perfectly lightweight and easy-to-wear to your Yoga or Bar Method class and stylish enough for running errands around town!
Oh, and did I mention there is no sewing required?!
DIY Multi-Strand Scarf
Makes one stylish scarf

Ingredients:
1 old T-shirt (the bigger the better)
1 pair of scissors
1 ruler
10 minutes
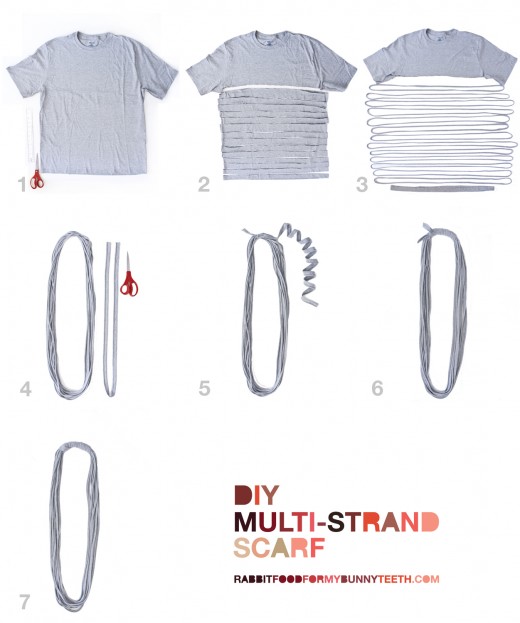

1. Start with a large T-shirt. Any old shirt will do! Seamless is a plus!

2. Cut off the bottom hem of the shirt. Then cut 1in – 2in wide strips horizontally across the shirt from bottom to armpit. You can cut as many strips as you would like (I liked my thick strips the most). The more strips, the more strands your scarf will have. You can use a ruler to guide a straight line across the shirt, but don’t worry if they aren’t perfect.

3. Set the bottom hem aside. Stretch all of the remaining strips until they become long, and the raw edges start to roll inwards.

4. Cut one end of the bottom hemline so it becomes a string.

5. Using the strip of bottom hemline, knot it around the strands to secure them in place.

6. Wrap the strip a few inches around the center of the scarf, and back over to meet the other ends. Knot the ends together tightly.

7.  Trim the loose ends and tuck the knot underneath the wrapped fabric.

Viola, a stylish scarf to wear to yoga! Wear it long or bundle it up, it’s super fun and easy-to-wear!
Post or email your photos if you make a scarf! I can’t wait to see your creations!


DIY Workout Shirt

Happy Fashion Friday!
I have a super fun arts and crafts project for my beautiful little bunnies to try over the holiday weekend!

I love buying new clothes, but sometimes I love making them even more!
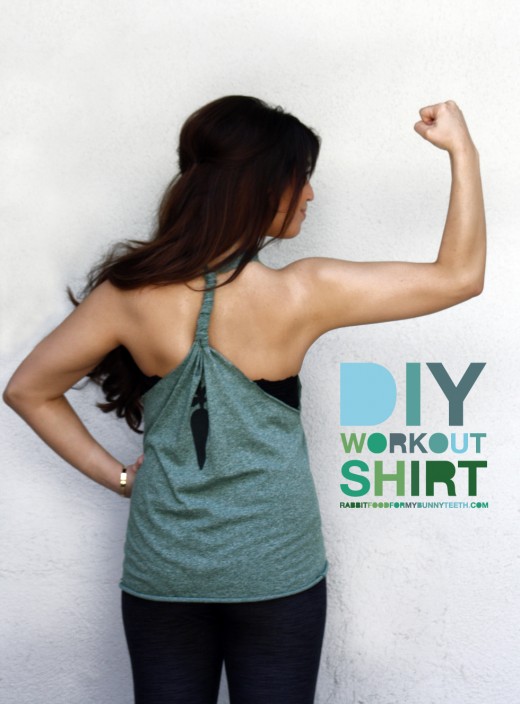
I started college as a fashion design major, so I have always been a little crafty when it comes to recycling old T-shirts. This has to be my new favorite DIY reclaimed shirt. You can wear this casual racerback to your workout and then dress it up with a lacy bandeau when you meet your friends for some rabbit food afterwards. Turn your basic into a chic little number and go hit the gym like you own it!

DIY Workout Shirt
Makes 1 sexy little tank

Ingredients:
1 old T-shirt
1 pair of scissors
20 minutes

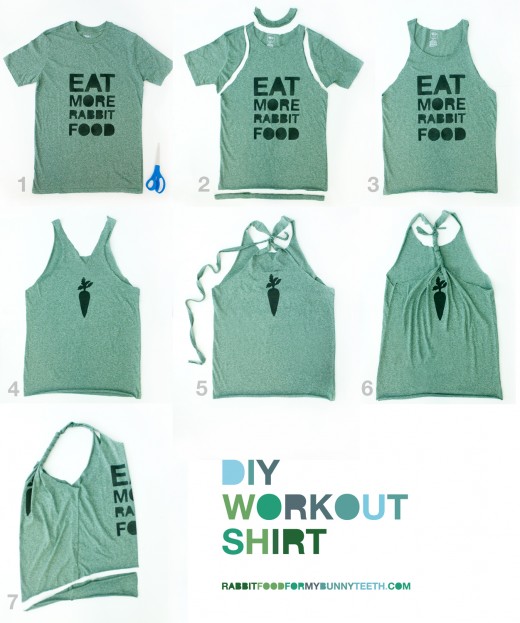
1. Start with a pre-washed T-shirt. Any old shirt will do! The bigger the better.

2. Cut away the ribbed neckline and bottom hem. For the sleeves, cut downwards starting from the shoulder, determining how thick you want your straps. Cut straight down and then begin to curve down below the armpit seam.

3. Determine how low you want your front neckline, and cut away.

4. Flip the shirt over and make a narrow racerback, curving inward from the armpits.  Then cut a deep “V” shape from the top neckline.

5. Using the excess bottom hemline, stretch it out until it becomes one long string of fabric. Knot the string a couple of inches above the bottom of the “V” shape.

6. Wrap the string all the way down around the center of the racerback, and back up to meet the other ends. Knot the ends together tightly. Trim the loose ends.

7. To give your tank a high-low look, lay your shirt sideways, flattening it out evenly. Starting a few inches up at the front of your shirt, start cutting diagonally until you reach the back.

Throw it on with some cute yogis, grab your water, and hit the gym!
Post or email your photos if you make a shirt! I can’t wait to see your creations!

If you loved this DIY, you may also like my DIY Multi Strand Scarf! No sewing required! 

1 2 3