


I hope that everyone had a happy Halloween! If anyone was curious about this year’s Halloween costume… I was a cactus! I cut white pipe cleaners into small pieces, folded them into “V” shapes and stitched them all over a green fitted American Apparel dress! I added a cactus flower in my hair and as a ring as well : )
Thursday-Saturday consisted of lots of sugary drinks, candy, and costume changes and I think it’s about time for a juice cleanse!
I’ve been complaining to my friends about being super tired and sluggish, and to be honest it’s probably all of the extra crapola that i’ve been eating! Halloween is only once a year, and candy and punch is necessary to celebrate.
My friend Brett (my gorg bunny model) and I are starting a 3 day juice cleanse and I would love some bunnies to join us! I’ll be posting my daily juices and feedback on my blog for you guys to read and follow along. It’s always great to have a buddy so you can hold each other accountable and stay motivated.
I’m really really excited for this post, because I love sharing what i’ve learned along the way of my weight loss journey. I want to showcase my simple juicing tips to make a homemade juice cleanse less intimidating and less time consuming for you guys. Hopefully you will learn some new tricks or be inspired to do a cleanse of your own after reading this!
TIP #1: BUY LOCAL. IT’S CHEAPER.
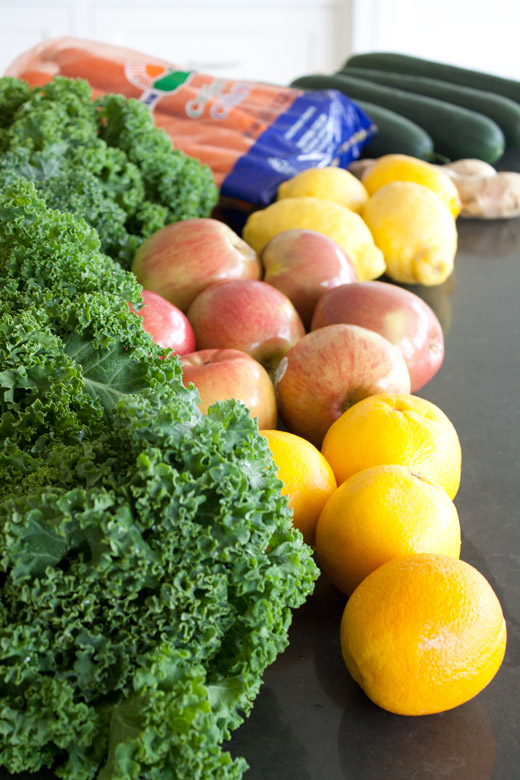
A lot of people can get turned off by juicing or juice cleanses because of the price. Store bought juice cleanses are super pricey, but making it at home doesn’t have to be!I went to a local store called “Growers Direct” which has excellent prices. I bought all of my produce for the next 3 days for $14.50 (unless I forgot something and need to go back!). Farmers markets are excellent for buying produce for a juice cleanse because they tend to be less expensive than your average grocery store or Whole Foods. Even hit Costco or Sam’s Club for bulk produce!
What I bought:
4 bunches of kale
4 oranges
4 lemons
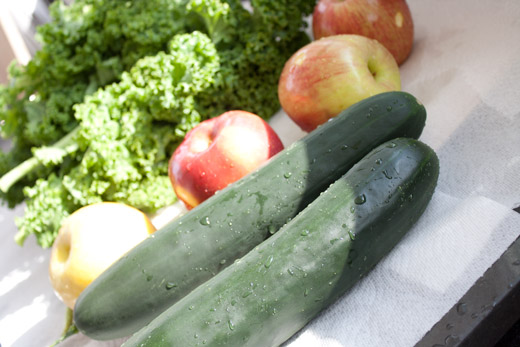
4 cucumbers
7 Fuji apples
ginger root
5 lb bag of carrots
All for $14.50! That’s the price of 2 store bought juices, or one meal at a restaurant!


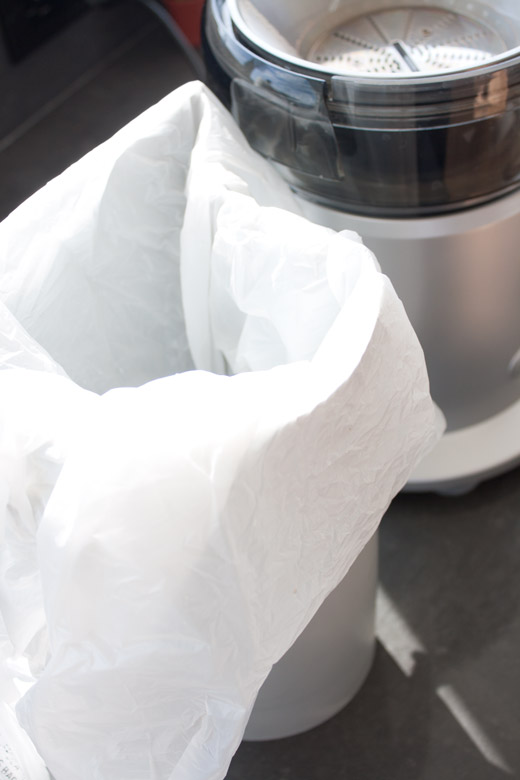
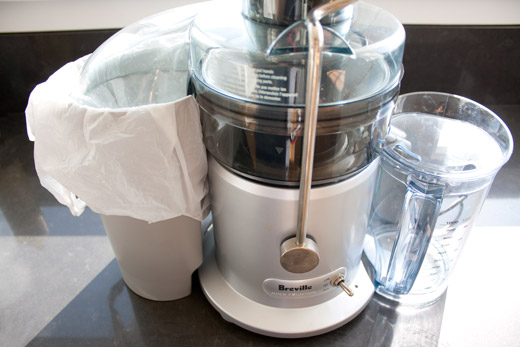
TIP #2: LINE THE PULP BIN WITH A PLASTIC BAG.
This will definitely help when cleanup time comes! You won’t have fruit and veggies bits all over your kitchen and they will be pre-bagged and ready to be transferred. For ideas on what to do with your pulp, see TIP #7.
TIP #3: SORT YOUR PRODUCE FOR WASHING.
Place all of your produce that needs to be washed in the sink (anything that the skin remains on i.e. apples, greens, cucumber, grapes, etc.). In the meantime, place a few pieces of paper towel next to the sink for easy drying. Kind of like a little fruit & veggie washing assembly line!
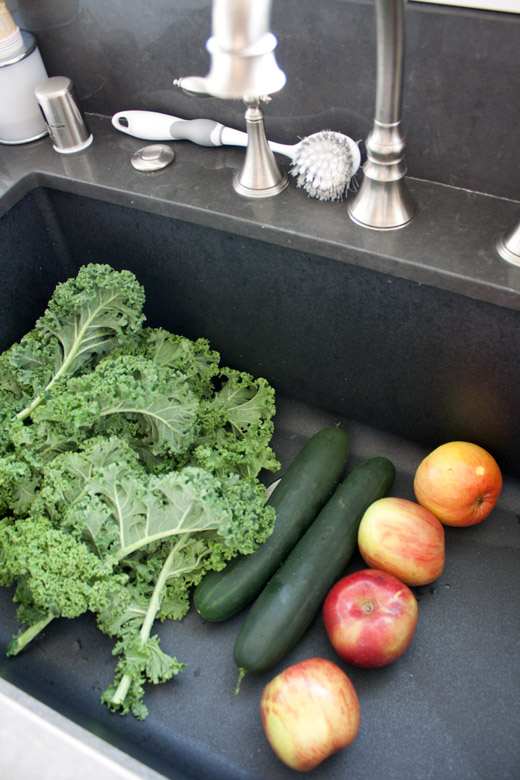 After your produce has been rinsed, place them on the paper towel and gently blot dry. Don’t worry about drying them completely, just blot the excess water.
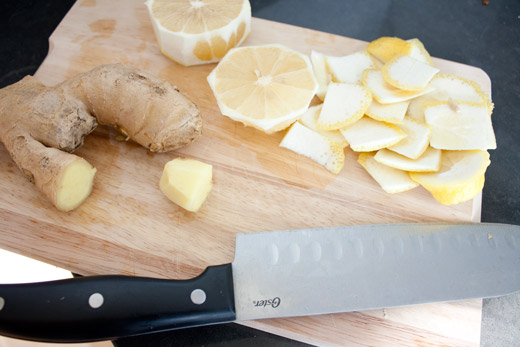
TIP #4: SORT ITEMS THAT NEED TO BE CHOPED
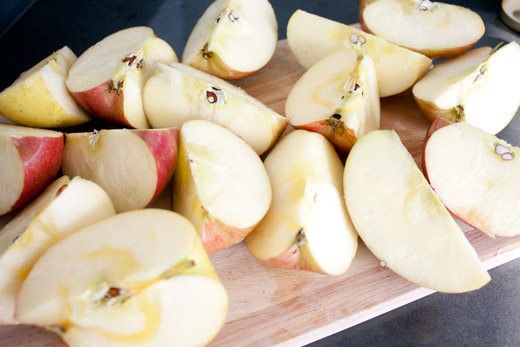
Sort any produce that needs the skin removed (i.e. citrus and ginger.) At this time, you will also want to chop any large fruits or vegetables that cannot fit into the juicer whole. I like to chop my apples into 4 pieces each so they’re easier to feed into the juicer.
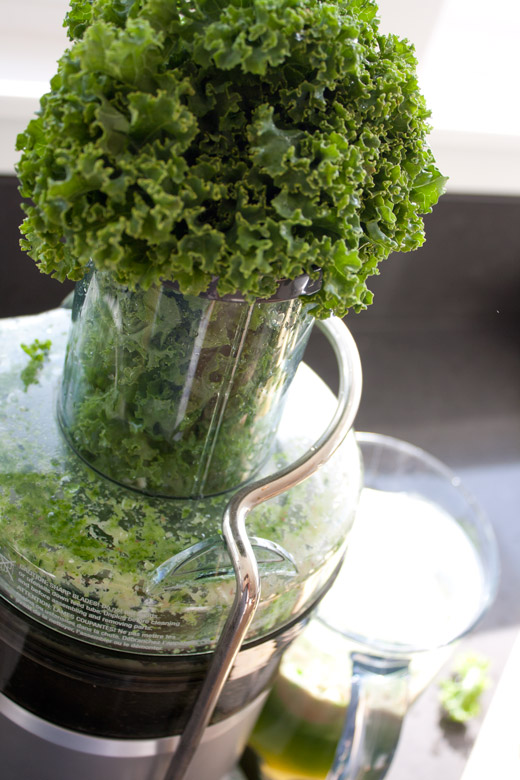
TIP 5: JUICE CITRUS IN BETWEEN SOLID PRODUCE.
To get the most juice out of your citrus and greens, place them in between more solid produce like apples or cucumbers. I like to line up the “mouth” of my juicer with an apple, lemon, and then more apple and press it in with the “plunger.” This way I know I’m getting all of my citrus juice pressed in!
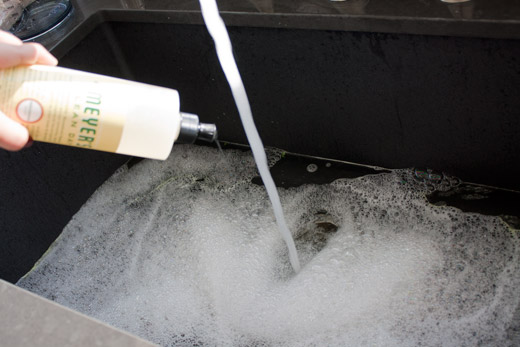
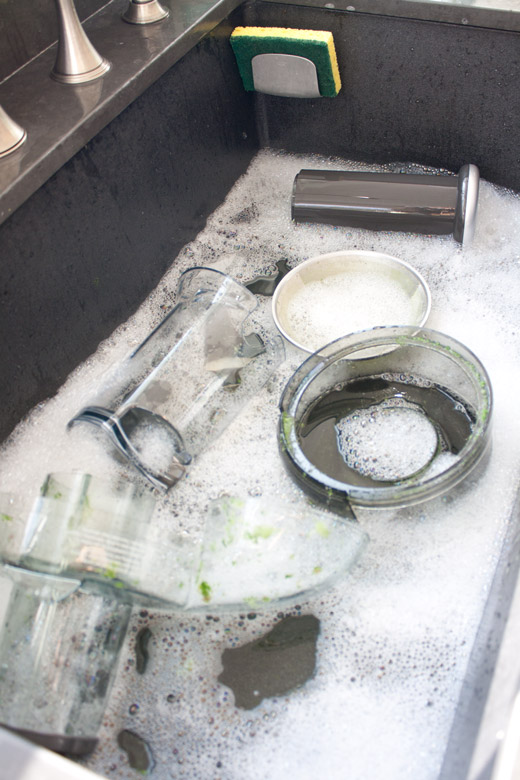
TIP #6: FILL THE SINK WITH SOAP AND WATER FOR QUICK CLEANUP
Fill your sink with warm water and soap while you juice your produce. This will make the cleanup process MUCH faster! Once you finish juicing, place all of your washable juicer parts in the sink and let them soak while you bottle up the juice. This will allow the soap and water to help loosen up the pump for quick and easy part cleanup!
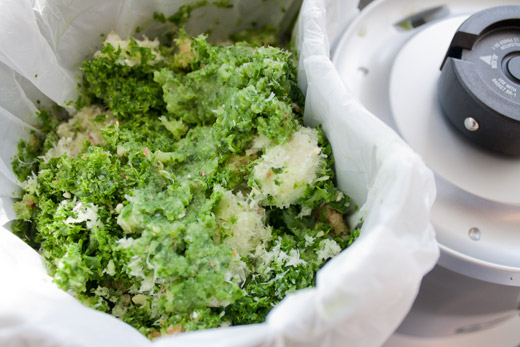
TIP #7: RECYCLE YOUR PULP!
Now that your pulp is already stored in a plastic bag, it’s super easy to transfer it to your refrigerator for later use, or to compost! I love using juice pulp for crackers (recipe coming later this week)! Just remember, if you want to use your juice pulp for another recipe later on, be sure to remove any inedible seeds and skin before juicing. Get that pulp in the refrigerator and save it for my Juice Pulp Cracker recipe later this week!
TIP #8: LINE YOUR COUNTER WITH PAPER TOWEL FOR JUICE STORING.
Line your counter with a couple sheets of paper towel to make the juice storing process less messy. Remove lids from your glass jars and get ready to pour.
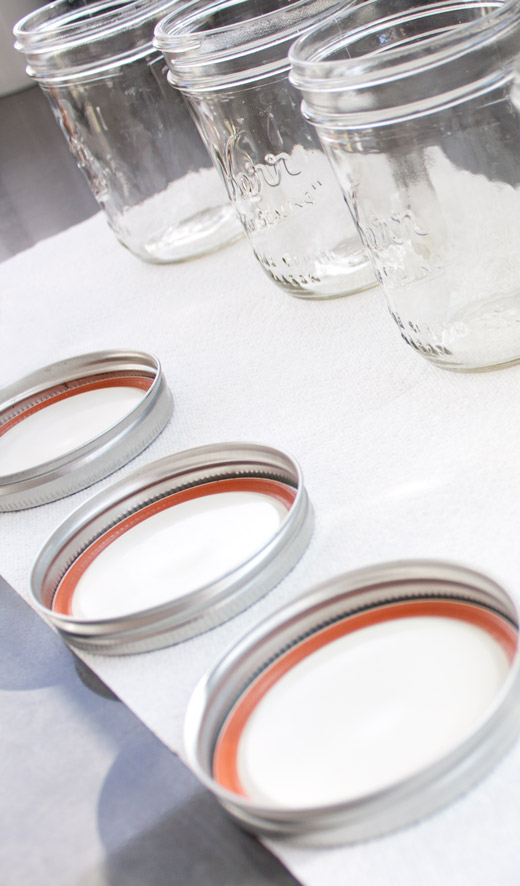
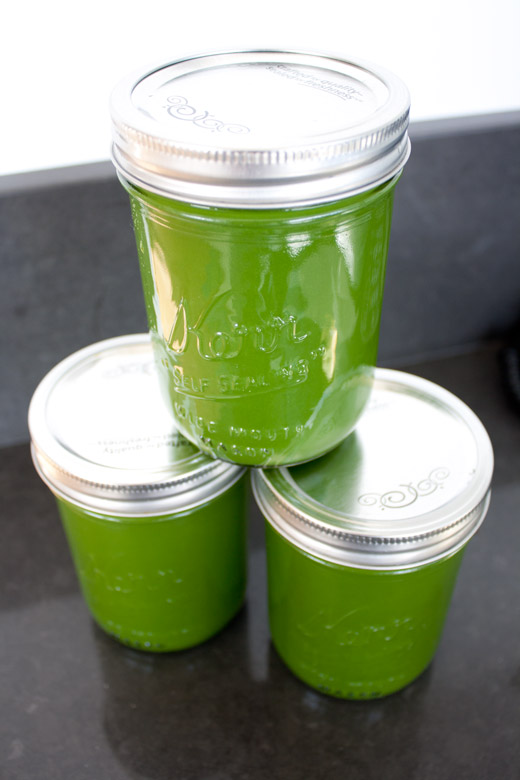
Tip #9: HOW TO PROPERLY STORE YOUR FRESH JUICE
Fresh juice right out of the juicer is not only the best tasting but the best for you because of it’s high nutrient level. But we can all agree that it’s not always practical, right? No one really has time to juice several times per day, so it’s necessary to make juice beforehand. A couple of questions I frequently receive are “Is it possible to make juice ahead of time?,” “how long does juice last in the fridge,” and “how do you store fresh juice?” Well here are my answers. Yes, it is possible to make a batch of juice ahead of time and store it for later. Fresh juice can last about 24 hours without losing any nutrients if stored properly.
The biggest concern for keeping juices fresh is oxidation. During the juicing process, fruits and vegetables are broken open and their enzymes and other nutrients are released from the fiber. When the juice is exposed to air it gives up an electron to the oxygen in the air, thus oxidizing the juice and making it less nutritionally stable. If you can reduce the amount of time the juice is exposed to the air and seal it up quickly you have a better chance of keeping the nutrients intact.
This means storing your juice in glass jars with an air tight seal. Below I will describe the process of filling the jars to get the least amount of oxygen in them as possible!
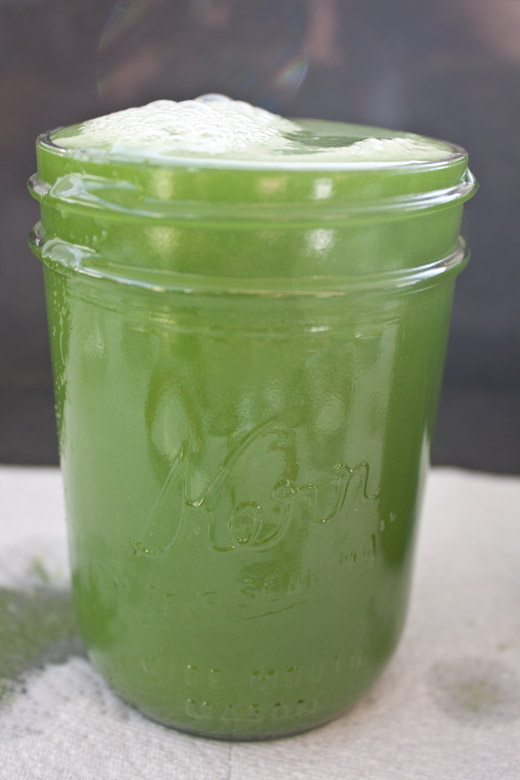 Fill the jars all the way to the top rim with juice so that they actually overflow a little. The goal is no air inside the jar.
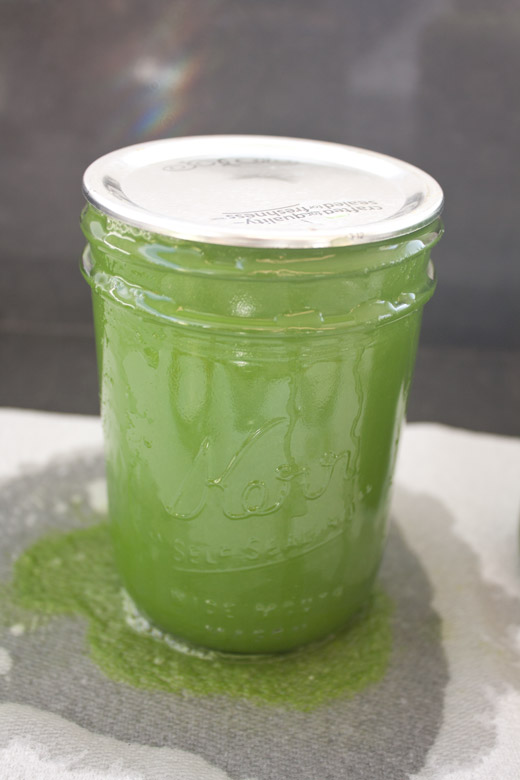 Place the metal lid on top of the jar. Some juice may overflow, which is ok. This ensures that there is no excess oxygen in the jar.
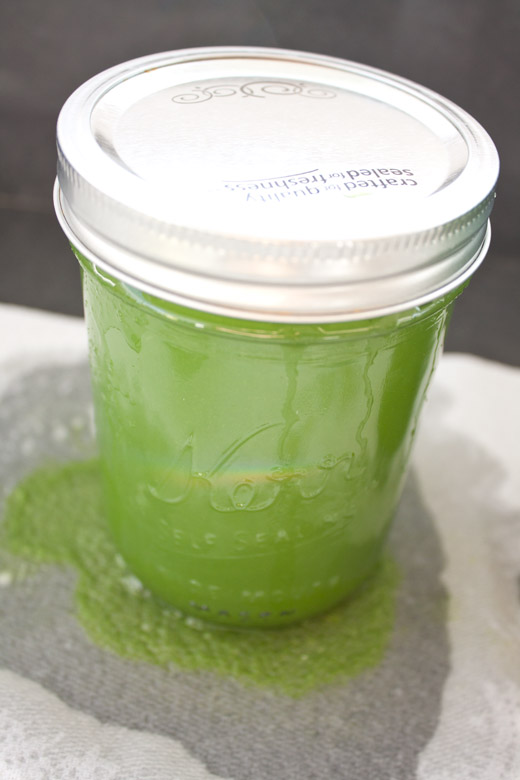 Screw the metal band on tightly to ensure the lid is on and sealed.
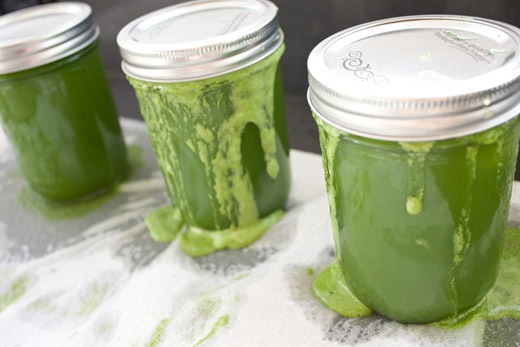 Clean off the jars and throw away the paper towel. Store for up to 24 hours in the refrigerator! Careful when opening, they’re full!
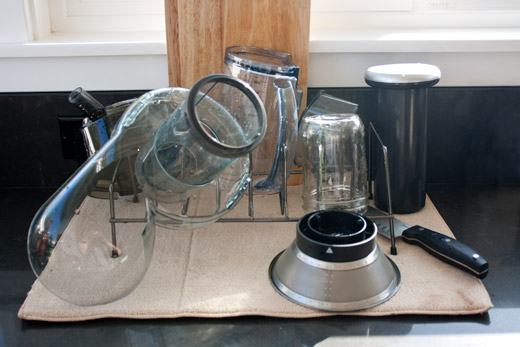
TIP # 10: DRY JUICER PARTS ON A DRYING RACK
After cleaning all of your juicer parts, let them air dry on a drying rack (I bought a bottle rack at Target for about $10). The less work, the better, and the more likely you will be to juice again!
 Now for that juice recipe you’ve been waiting for!
 Catherine’s Glowing Green Juice
Makes 4 16oz servings
2 bunches of curly kale
4 Fuji Apples
2 Lemons, skin removed
2 large cucumbers
1.5-2 inch slice of ginger, skin removed
This is one of my favorite juices and an excellent basic green juice for a cleanse!
I hope that these juicing tips have helped and/or inspired you to juice at home! xo
If you have any juicing tips, let me know in the comments below!
