chic

DIY Recycled Gift Bow

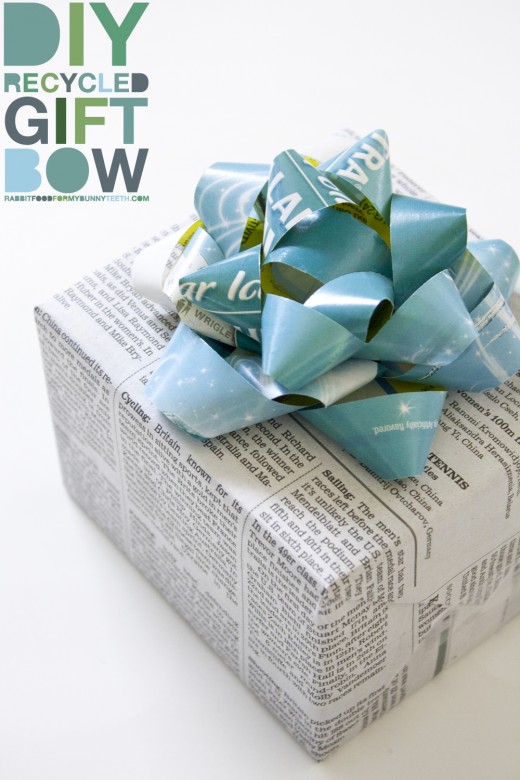
A couple of weeks ago I posted a picture of my famous newspaper gift wrapping and bow on Instagram and a few of you wanted a tutorial, so here is it! Although this isn’t a Fashion Friday DIY, and it has nothing to do with health or fitness… I did use Fitness Magazine as my bow material and the Sports section of the Los Angeles Times for my Wrapping! Plus, I just love DIYs and it’s still something fun and easy to make! I cannot tell you how many times I was wrapping paper-less in college. It seemed like every week was someone’s birthday, and I needed a makeshift gift wrap that didn’t look like it was thrown in a Trader Joe’s grocery bag, although I have done some sweet wrapping with those bags! The possibilities of recycled gift bows and wrapping are endless from magazines, newspaper, maps, photos, and posters. Whatever you decide to use, you can make some gorgeous eco-friendly custom wrapping!

DIY Recycled Gift Bow
Makes 1 cute bow

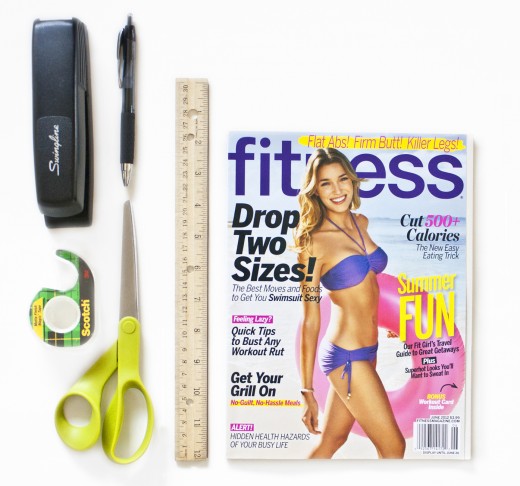
1 magazine page
1 ruler
1 pen
1 pair of scissors
1 stapler
1 roll of tape
10 minutes

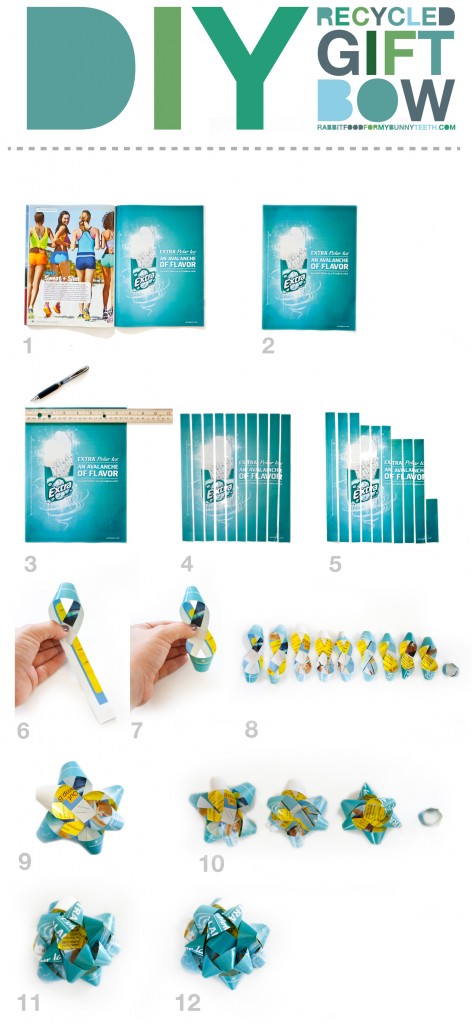
1. Select one magazine page for your bow. It can be random or based on color, pattern, etc.
2. Carefully remove your selected page from the magazine.
3. With a ruler and pen, measure and mark the magazine page into 9 strips that are 3/4 inch each. The last “leftover” strip will be a little wider than 3/4 inch, this is ok.
4. Cut each strip in a straight line.
5. Leave the first 3 strips full size. Remove 1 inch off of the top of the next 3 strips. Remove 2 inches off of the top of the next three strips. Cut the remaining strip so that it is 3 1/2 inches in height.
6. Take one strip (with the color you want to show on the outside) and loop one end to the center, at a diagonal so a “ribbon” shape is formed.
7. Loop the remaining end so that the strip resembles a figure eight and secure it with a staple.
8. Follow steps 6 and 7 with each of the strips and keep them in size order. Take the 3 1/2 inch single strip and form it into a loop and staple or tape the ends together.
9. Take the first set of same sized figure eights and arrange them into a flower shape and secure them together with a  staple.
10.  Follow step 9 with the next 2 sets of figure eights.
11. Place each flower on top of each other and secure with a rolled piece of tape; largest on the bottom and smallest on the top.
12. Finish your bow by filling the center in with the remaining loop. Secure the loop with a rolled piece of tape.

Optional: Wrap your gift in newspaper or matching magazine pages, enjoy!
Custom Cards: I love making cards out of Crossword Puzzles from newspaper and magazines. You can try to fill the spaces with a note to your gift recipient! 

DIY Workout Headband

Happy Fashion Friday, and welcome to my third Workout DIY!
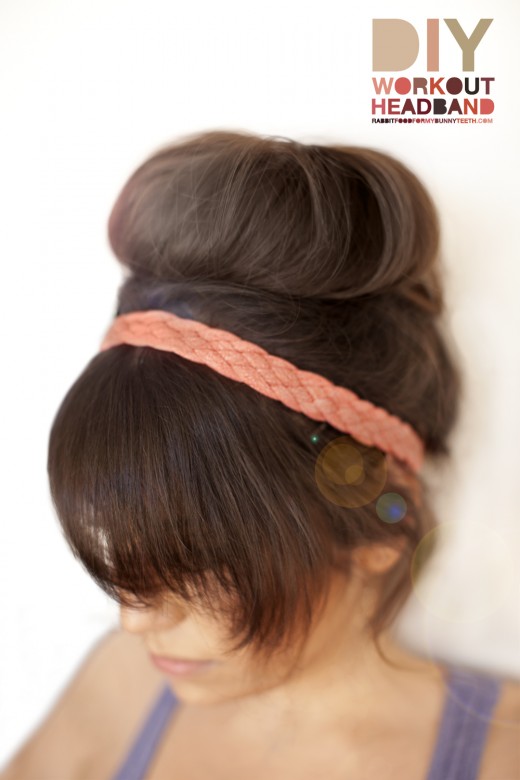
If you’ve already made my DIY Workout Shirt and DIY Multi-Strand Scarf you can now complete your look with a DIY Workout Headband! Keep your bangs or little whispy hairs out of your face during an intense sweat session, or hit the yoga studio in style with this super cute five strand braided headband!

Who doesn’t’ want to be decked out from head to toe in homemade RFFMBT no-sew workout clothes?!
DIY Workout Headband
Makes one chic headband
You could make up to 3 headbands depending on the size of your shirt & amount of fabric left! 

Ingredients:
1 old T-shirt
1 pair of scissors
1 piece of tape
30 minutes

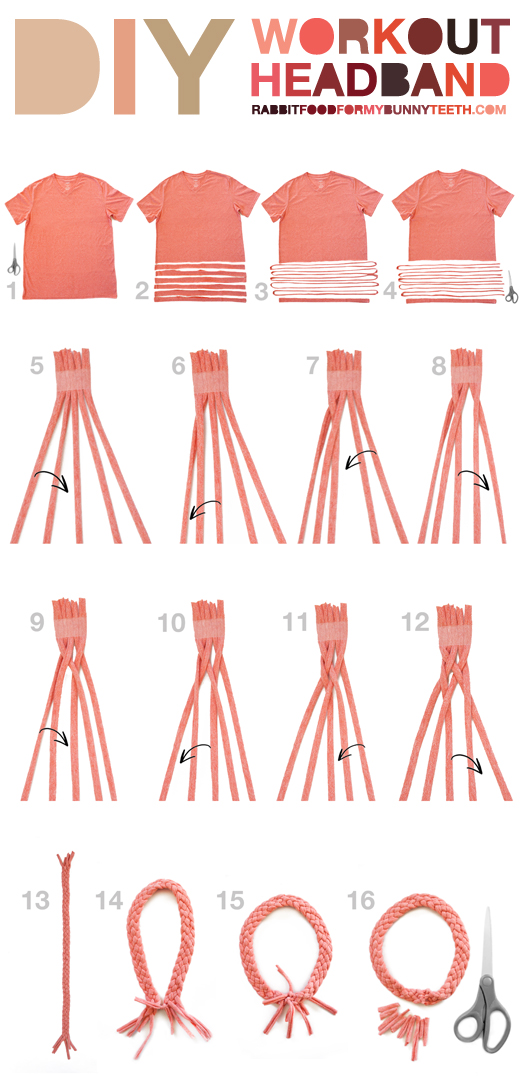
1. Start with a large T-shirt. Any old shirt will do! Seamless is a plus!

2. Cut off the bottom hem of the shirt. Then cut five 1in wide strips horizontally across the shirt starting from the bottom. You can use a ruler to guide a straight line across the shirt, but don’t worry if they aren’t perfect.

3. Set the bottom hem aside. Stretch all of the remaining strips until they become long, and the raw edges start to roll inwards.

4. Cut the five strands in half so they become long strands (instead of circles).

5. Gather the five strands, and secure them onto a hard surface with tape. This will make it easier for you to braid. Take the outside left strand and place it one over to the right.

6. Take the middle strand and place it one over to the left.

7.  Take the outside right strand and place it one over to the left.

8. Take the middle strand and place it one over to the right.

9.  Have you noticed the pattern? outside over one to the right, middle over one to the left, outside over one to the left, middle over one to the right … work from the left three strands, to the right 3 strands. Keep repeating these steps (9-12 are the same as 5-8)! Take the outside left strand and place it one over to the right.

10. Take the middle strand and place it one over to the left.

11.  Take the outside right strand and place it one over to the left.

12. Take the middle strand and place it one over to the right.

13. Once you have finished braiding, trim the headband to fit your head, leaving about an inch on each end for knotting.

14. Start by double knotting one strand from each end of the braid together.

15. Match each end with another strand from the opposite end and double knot.

16. Trim the ends off of the double knots, and you’re done!

Tadaaaa! A chic headband for your next workout! You could even make 2 or 3 headbands out of one shirt, woo!
Post or email your photos if you make a headband! I can’t wait to see your creations!